Creating Filters & Rules for Import
- 24 Mar 2023
- 5 Minutes to read
-
PDF
Creating Filters & Rules for Import
- Updated on 24 Mar 2023
- 5 Minutes to read
-
PDF
Article Summary
Share feedback
Thanks for sharing your feedback!
Overview
Cloudingo will check for existing records before bringing in the import data. Upload files to scan against Leads, Contacts, Accounts, or Custom Objects. Perform multi-object scans with the same file upload if desired. Before importing, determine how to scan for duplicates and which filters to use. Create import-specific filters on the fly or pre-configure Dedupe filters for future use. Use existing or set up new import rules to define how records get merged if the file data is more valuable to retain than the existing record’s data.
Using Filters in Imports
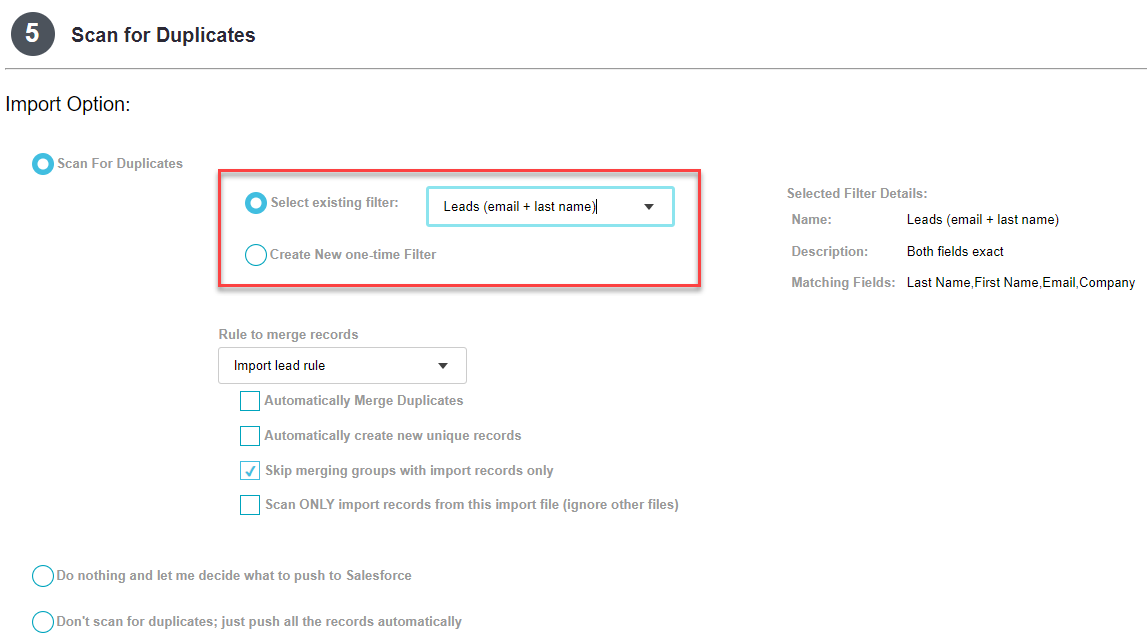
- Imports can use pre-built filters from the Dedupe dashboard or create new one-time matching criteria during the import process.
- Recommended practice is to use pre-built filters if performing similar uploads in the future.
- Before importing, decide on how to identify and merge duplicates.
- Decide on what criteria (e.g., email, email + name, phone, etc.) should be used to determine duplicates. Choose as many matching algorithms as desired.
- If using pre-configured filters, make sure the import file contains the criteria specified in the ‘Limit Your Records’ or ‘Limit Your Groups’ (Steps 3 or 4) in the filter configuration.
- For example, if the filter requires specific columns to limit the matches (for example, a specific Record Type ID), make sure to add the column to the file and map it during the import process.
- If the import does not find any duplicate matches, check the filter configuration, and consider creating a new filter if necessary.
- Use the ‘Rescan’ option in Step 6 to scan against multiple filters. Scan using the first filter and merge. Then, rescan the remaining records against additional filters to find additional matches. Merge duplicates detected with each filter scan.

Using Rules in Imports
- Import scans can identify a single record match or multiple record matches if Salesforce duplicates have not yet been deduped. This will impact merging imports with the identified matches (making the rule a critical piece).
- Determine the value of the imported data.
- To never override an existing record’s data with the file data, a pre-built rule already being used for regular dedupe can likely be used for import.
- If the file data is more valuable to retain than the existing data in the Salesforce org for some or all the fields in the upload, set up a new import rule to use for file uploads.
- Make a copy of an existing rule that has most of the merging logic already pre-defined. This will ensure that the import process will know how to merge records based on the rules already set up.
- Rename the newly copied rule to specify that it is an Import Rule. This will help keep track of the import rules created and ensure the correct rules are chosen during the import process.
- The master selection in the rule will never choose the import as the master. The existing Salesforce record will always be retained, and the imported data will be merged into the matched record. This is to ensure best practices and prevent any unnecessary risks to data.
- The Default field rule is commonly configured to “fill in the blanks” for any field value not already populated on the master record. When set to ‘override master when blank’, Cloudingo will always pull in a value from one of the non-master Salesforce records or from the import file to give the most complete record possible.
- Configure specific field rules using the ‘Incoming record (import or API value)’ and ‘always override the master with a value’ settings. This will ensure that Cloudingo always chooses the import record value during the merge process.
- Example: If the file contains more up-to-date phone numbers than the existing data in Salesforce, set up a specific field rule in the Import Rule for Phone, selecting ‘Incoming record (import or API value)’ and always override the master with the imported value.
- Repeat this process for any other fields in the file that should override the existing record’s field data. This will ensure that the imported data takes precedence during the merge process.
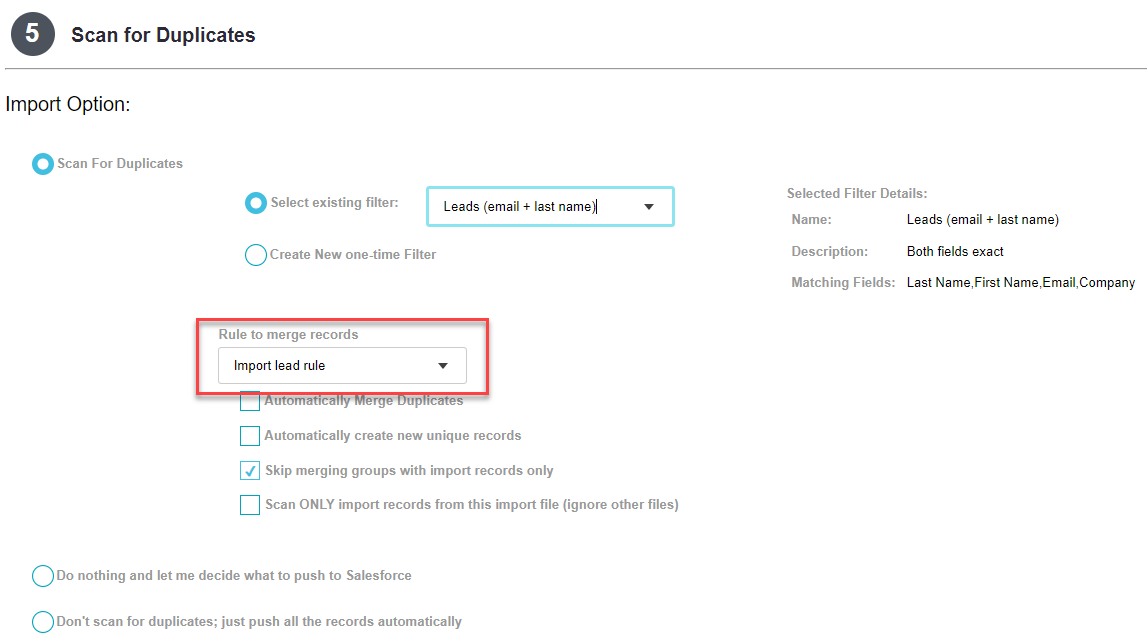
- Finally, make sure to select the Import Rule during the scanning process (step 5). The import process will then apply the rules configured for merging the import records.
Looking at an Example:

- Master Record Selection:
- In this example, Cloudingo chooses the master record using the highest priority status based on the rule definition. If more than one match is detected, the tiebreaker will determine the master; Oldest Created.
- If only one match is detected, Cloudingo will always choose the Salesforce record as the master.
- Default Field Values:
- In this example, the Default Field Values rule is set to 'Newest (ordered by MODIFIED date)' 'And override master when blank'.
- This setting will fill in the missing values with the newest modified Salesforce record (if more than one match is detected) and override the Master record if the Master field value is blank.
- 'Override master when blank' is the recommended Default Field Values setting.
- Be cautious when setting the Default Field rule to 'Incoming record (import or API value)' and 'always override the master', as this type of configuration may have negative consequences. If using the incoming as your default field rule, test, and preview for accuracy before merging.
- In this example, the Default Field Values rule is set to 'Newest (ordered by MODIFIED date)' 'And override master when blank'.
- Specific Field Values:
- In the Specific Field Value section, configure rules for specific fields to override existing data with the file data.
- The Title and Phone fields in this example are set to the 'Incoming record (import or API value)' rule with the override set to 'always override master'.
- This means that the Title and Phone values will always be chosen from the incoming record (import file) if provided, or from the Master record if not provided.
- It is important to retain the baseline logic for the import rules that are normally used during a Salesforce merge to ensure accuracy.
- Example 1: In your regular dedupe merge rule, the Email Opt Out rule is set to prioritize a true value over a false one and the file does not contain Email Opt Out data. Continue applying this logic in the import rule if the import merges with more than one matched Salesforce record.
- Example 2: In your regular dedupe merge rule, the Description rule is set to combine values from all records for merge. Continue applying this logic in the import rule in the event the import merges with more than one matched Salesforce record or if the import file itself contains a description value that needs to be combined.
- In the Specific Field Value section, configure rules for specific fields to override existing data with the file data.
Important Note:
Be sure to use a small file to test the filters & rules without automatically merging or pushing records during Step 5. Preview the results for accuracy. Make sure that the filter & import rule are working as expected for all fields before merging.
Once perfecting the import process, check out Import Templates here to streamline the entire process and eliminate manual work!
Was this article helpful?
