Manual Merge (single-object)
- 18 Apr 2024
- 4 Minutes to read
-
PDF
Manual Merge (single-object)
- Updated on 18 Apr 2024
- 4 Minutes to read
-
PDF
Article Summary
Share feedback
Thanks for sharing your feedback!
Overview
In this article, the topic of merging within single-table filters like Leads to Leads, Contacts to Contacts, and Accounts to Accounts are covered. For more information on multi-table filters (Lead to Contact, Lead to Account), please visit our Converting Leads article.
Before Getting Started:
Understand the filter and rule configurations before starting the manual merging process. This will help speed up the process and reduce errors.
Navigation
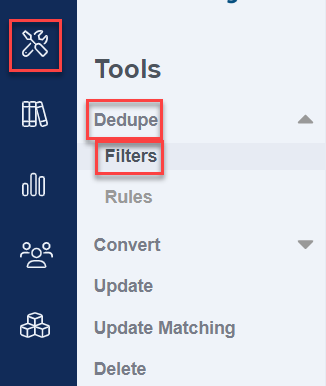
- If not already on the Filters dashboard, navigate to the ‘Tools’ → ‘Dedupe’ → ‘Filters’ option from the left-hand-side navigation bar.
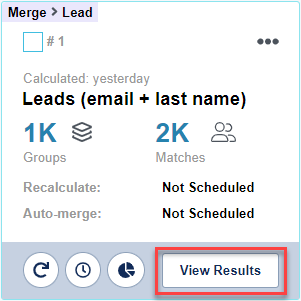
- Choose the ‘View Results’ option on any filter to view matches detected.
- Group names will be listed based on the group name field chosen in the second step of the filter configuration.
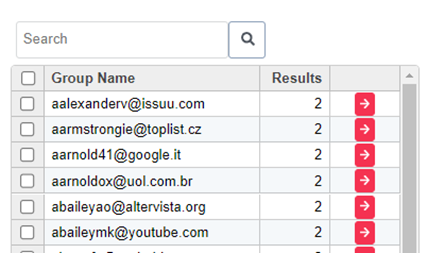
- To open a group, choose the red arrow to the right of the group name.
- Do not use the checkboxes. They are designated for mass merge.
- Group names will be listed based on the group name field chosen in the second step of the filter configuration.
Viewing Results in the Preview Page
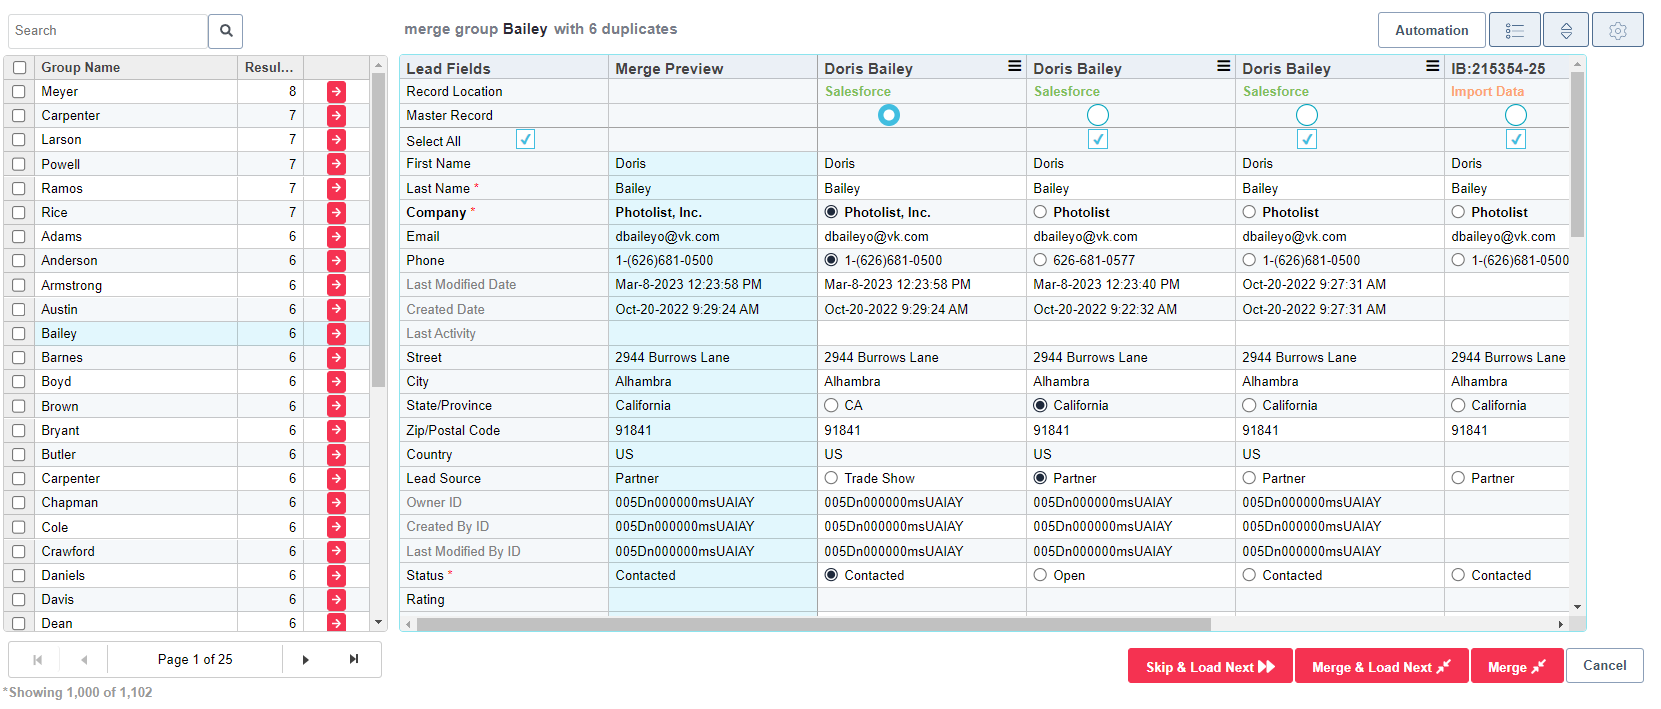
- The group details will be displayed on the left-hand side.
- To search for a specific group, use the ‘Search’ box at the top of the group list.
- Sort results in the group’s list in ascending or descending order by Group Name or Results count by clicking the header name.
- The blue column in the middle of the page displays an overview of what the final record will look like for merge.
- Master and field selections are chosen based on the rule assigned to the filter.
- Manual edits can be made.
- The white columns to the far right are the Salesforce records with all current field values as they appear in Salesforce.
- Learn more about using and customizing the preview page in the Merge Preview - Accuracy Check article.
Editing Data Within the Preview
- Field values that differ among records in the group will have a radio button next to each record's field value on the merge preview page. Any of these values can be selected, and once selected the chosen value displays in the merge preview (blue) column.
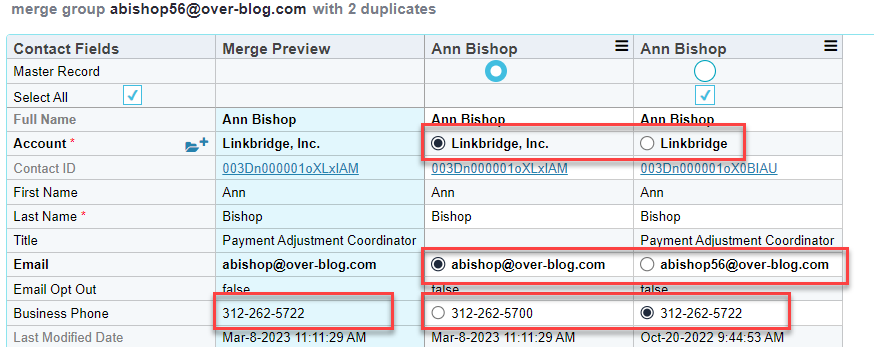
- Field values that are consistent across all records will be displayed but cannot be selected. However, values can be edited using inline editing.

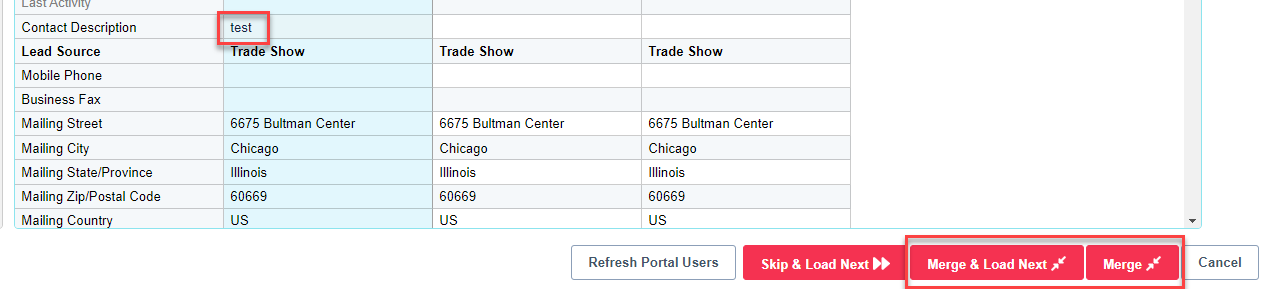
- Changes made to the merge preview (blue) column will be applied to the final record when using the ‘Merge’ or ‘Merge & Load Next’ options at the bottom right of the page.
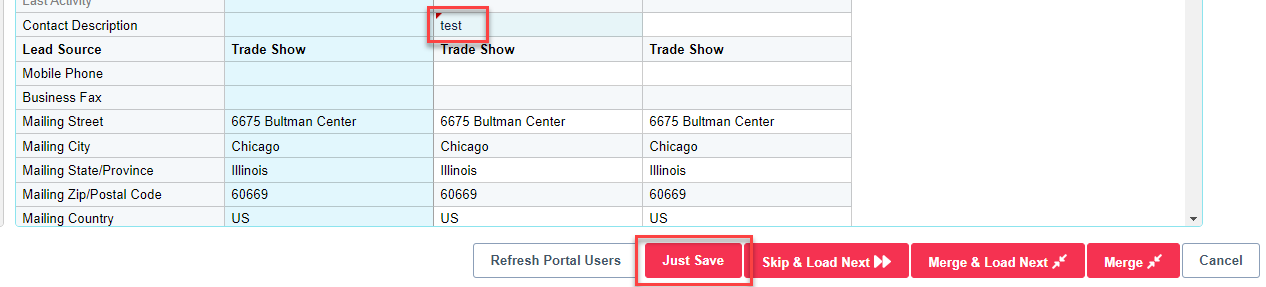
- To save changes made to individual records (white columns), use the ‘Just Save’ button at the bottom right.
- Note that manual changes made to individual records will not be applied during merge if not saved.
- Note that manual changes made to individual records will not be applied during merge if not saved.
- Changes made to the merge preview (blue) column will be applied to the final record when using the ‘Merge’ or ‘Merge & Load Next’ options at the bottom right of the page.
Account Lookup and Creation
- When working with Contact records in Cloudingo, the merged Contacts will be associated with the Account linked to the Master record.
- Choose a different Account from one of the non-master records using the radio button.
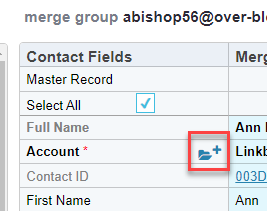
- Choose a different Account not already assigned to the records (click the search icon to find an existing Account).

- Create a new account (click the icon on the Account row next to the field name).
Merging Records in Cloudingo
- Preview the records to merge in the merge preview (blue) column.
- Choose from the following options in the lower right corner of the table:

- Merge: This merges the records and returns the view to the group list.
- Merge & Load Next: This merges the records and immediately opens the next group.
- Skip & Load Next: This loads the next group without merging the current group.
Important!
Do not use the Mass Merge option at the top left to make manual changes to the preview page. Mass Merge is designed for merging records in bulk and will not retain any manual changes made on the page.
Loose/Manual Filters
If a large majority of records have already been merged using automation or mass merge, extra guidance is provided here on how to review and merge records that are not safe to automate. Cloudingo offers a solution to help eliminate already reviewed to make the process easier. See more details in the Excluded Records article.
While viewing records side-by-side on the merge grids, the following options are available:
- Protect in Cloudingo: This protects the record and prevents it from being merged or updated.
- Hide from Cloudingo: This hides the record from the grid.
- View and manage excluded records that are protected or hidden in the Excluded Records section.
- Be aware that hiding or protecting records from Cloudingo means that Cloudingo will not manage those records, even if duplicates are created in Salesforce later.
- Consider excluding records by tightening the filter results when possible.
- Use Cloudingo's recommended solution in the Excluded Records article to manage manual filters where non-duplicates might pull in.
- View and manage excluded records that are protected or hidden in the Excluded Records section.
- Delete from Salesforce: This instantly deletes the record from Salesforce.
- View in Salesforce: This opens the Salesforce record in a new window.
Portal Users
- Community Portal Users are protected by default in the Excluded Records section. The option to ‘Protect all community portal users’ automatically protects all records with a portal association.
- Cloudingo will detect if your org is configured for Portal user access and enable a sync setting to force the User data to sync with Cloudingo daily.
- Directly force the User sync on the Merge Preview page using the ‘Refresh Portal Users’ option.

- To disable the portal protection option, uncheck the option in the Excluded Records section.
Was this article helpful?
