Filters Library
- 02 May 2024
- 3 Minutes to read
-
PDF
Filters Library
- Updated on 02 May 2024
- 3 Minutes to read
-
PDF
Article Summary
Share feedback
Thanks for sharing your feedback!
Overview
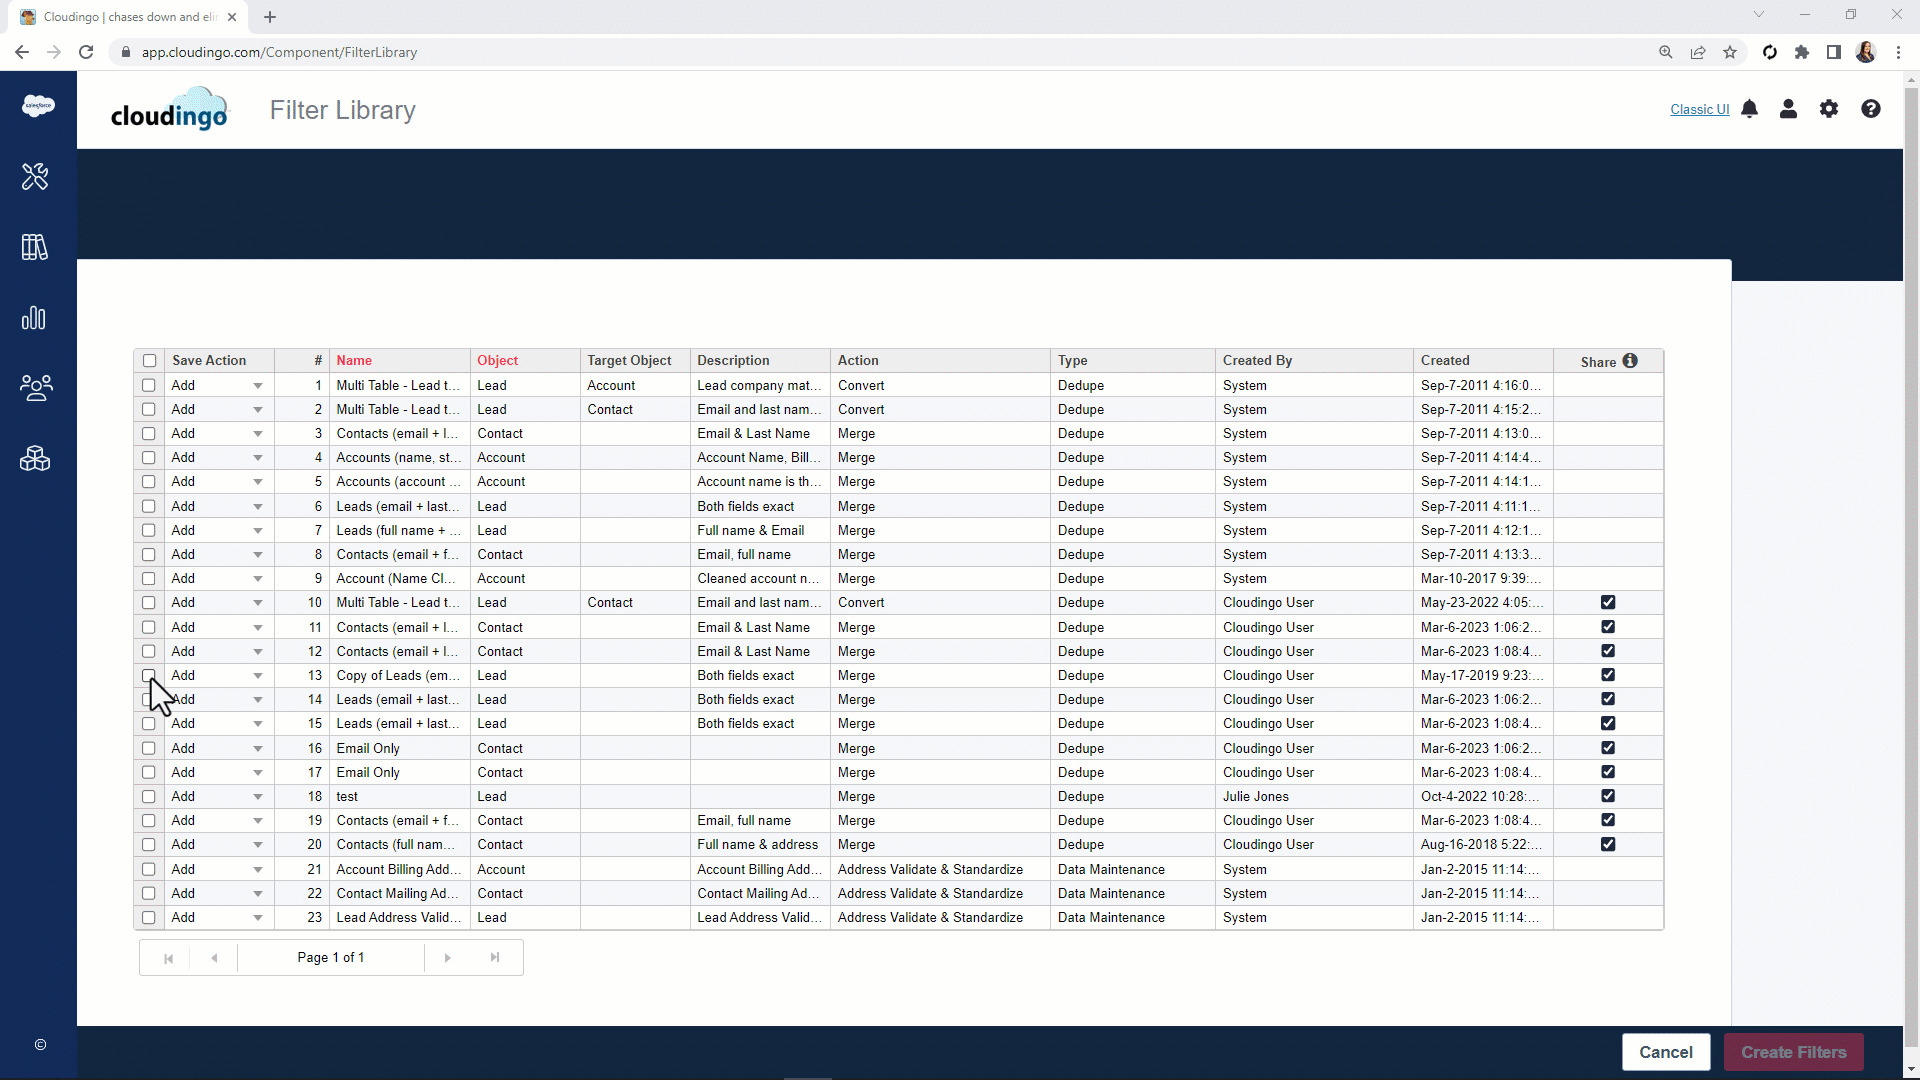
The Filter Library serves as a backup area or archive for filters in Cloudingo. It provides centralized access to filters for multiple connected orgs, making it easy to clean up and manage filters in the dashboard. The library also allows users to share filters with other users (Professional & Enterprise Licenses Only)or across environments (between Sandbox and Production, for example).
Message for Multi-User License (Professional & Enterprise Licenses):
Filters are individually owned. Users with permission can share a copy of their filters with other users using the filter library. When adding a filter to the library, a copy of the filter configuration is created and subsequently used to create new filters (using the same configurations) on other user's dashboards. When a user obtains a copy of a filter from the library, the copied filter will be owned by that user.
Changes made to filter configurations will not update other user's copy of the filter or vice versa. Any changes to a filter that needs to be shared again with other users will need to be re-copied to the library. Each user will then need to have the old version of the filter deleted from their dashboard and replaced with the new version. The filter library will list the date the filter was added, which can be used to locate each version. It is recommended that the library be managed by deleting old filter copies before replacing them with a new copy to keep the library clean.
Changes made to filter configurations will not update other user's copy of the filter or vice versa. Any changes to a filter that needs to be shared again with other users will need to be re-copied to the library. Each user will then need to have the old version of the filter deleted from their dashboard and replaced with the new version. The filter library will list the date the filter was added, which can be used to locate each version. It is recommended that the library be managed by deleting old filter copies before replacing them with a new copy to keep the library clean.
Navigation
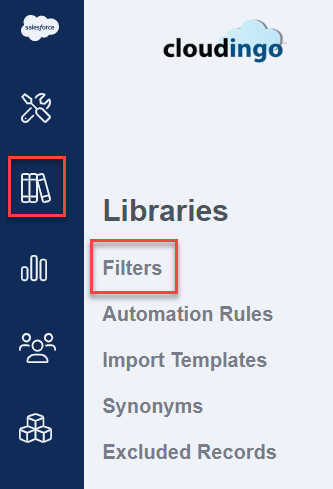
Choose the ‘Libraries’ → ‘Filters’ option in the left-hand-side navigation window.
Adding Filters to the Library
To add a filter to the library: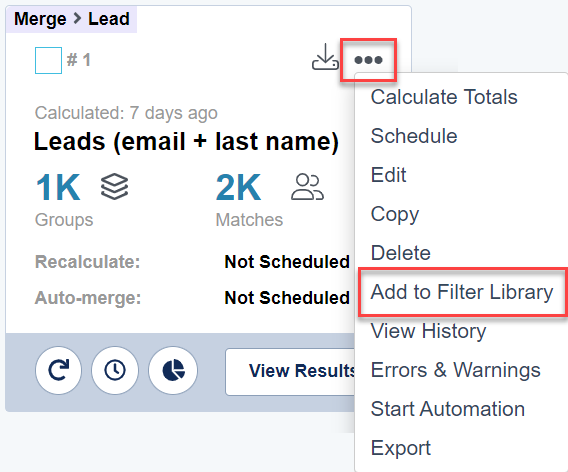
- Choose the filter's menu option at the top right corner of the individual filter tile.
- Choose ‘Add to Filter Library’.
- Confirm the action in the pop-up message that appears.
Removing Filters from the Library
Custom filters added to the library can be removed. Users can only delete their own filters. The Owner/Admin of the Cloudingo Account can delete library entries for any active user.
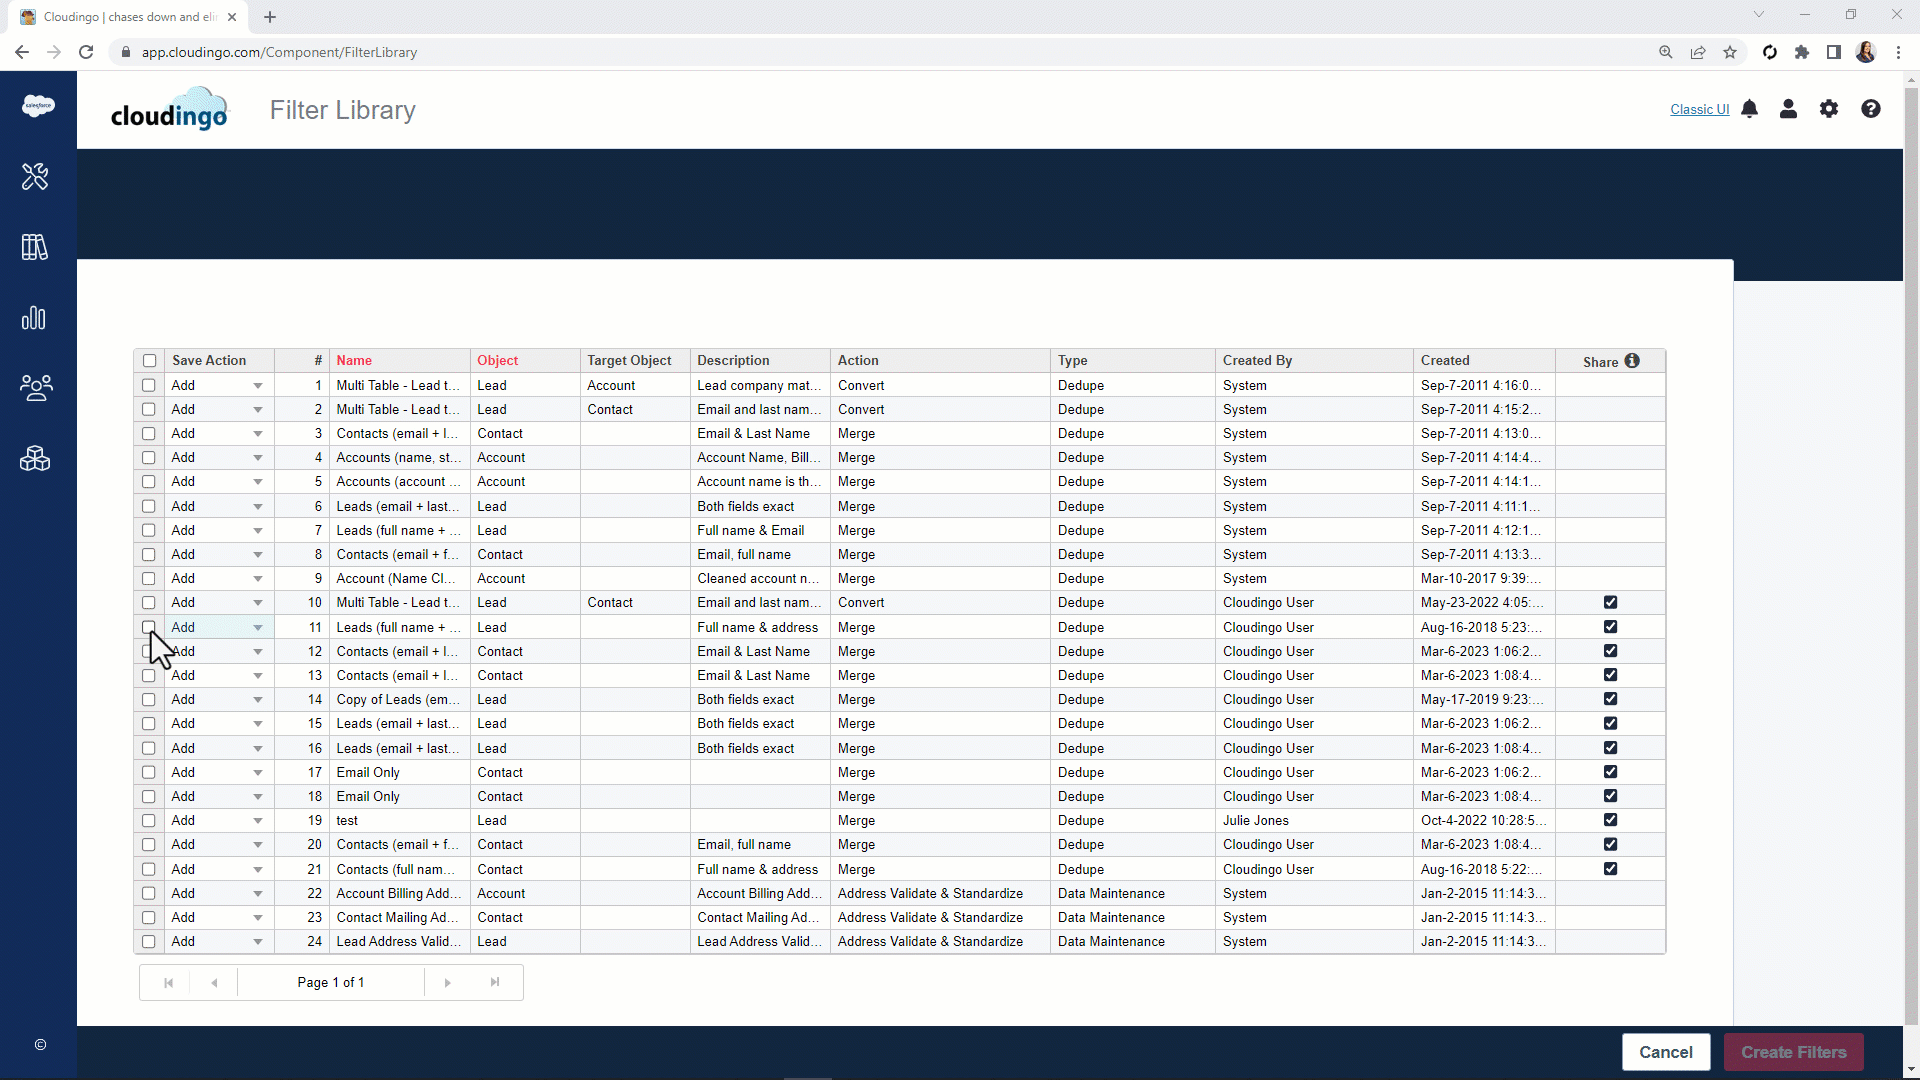
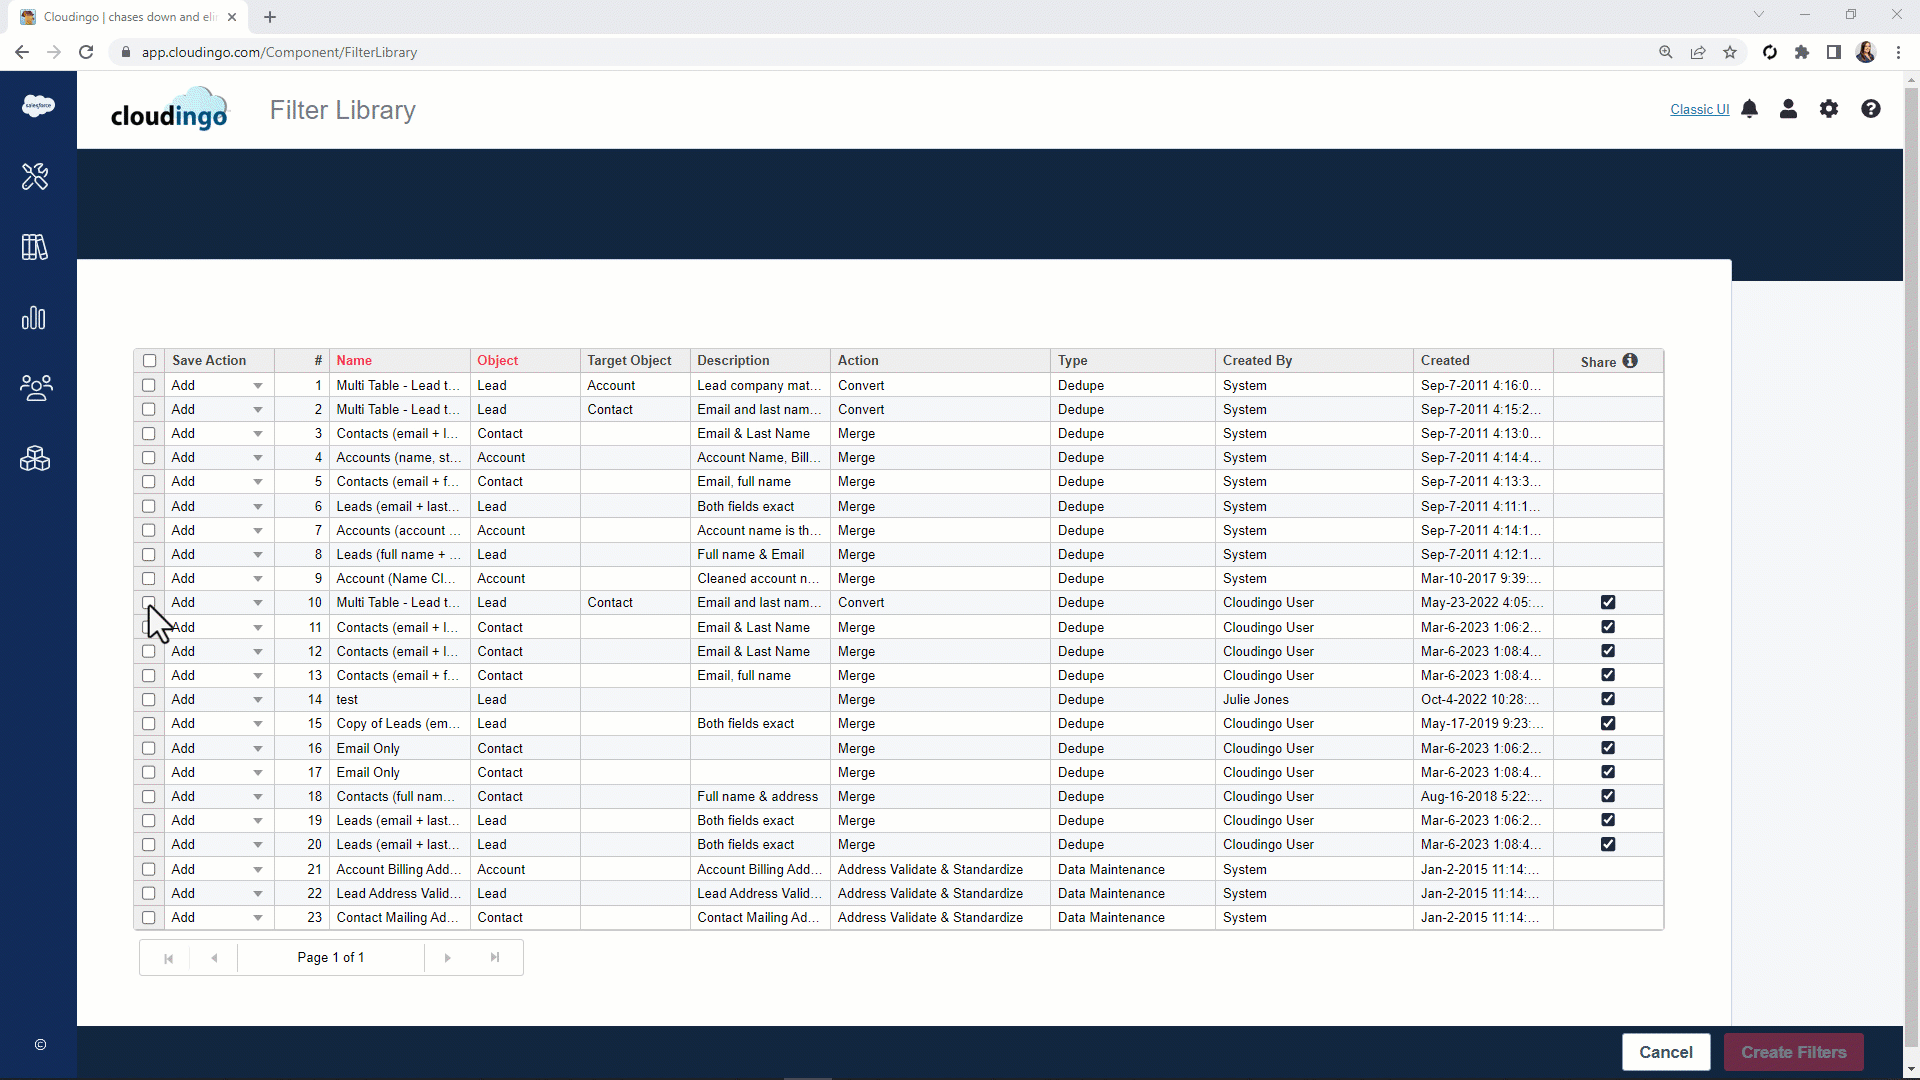
- Navigate to the Filter Library.
- Choose the box next to the filter(s) that need to be deleted.
- Choose ‘Delete’ from the drop-down menu for each filter being deleted in the ‘Save Action’ column.
- Choose the ‘Delete Filters’ option in the bottom right.
- Confirm the deletions on the confirmation page.
- Choose the ‘Save’ option in the bottom right to delete the selected filters or choose ‘Back to Library’ to cancel.
Note:
By default, the Filter Library will have some pre-built standard dedupe filters and three Data Maintenance filters in Cloudingo. These filters cannot be deleted from the library. However, they can be deleted from the dashboard if not in use.
Copying Filters to Other Users or Platforms
User options only appear for accounts that are licensed for multiple users.
- Add the filter(s) to the library.
- Navigate to the Filter Library.
- Choose the box next to the filter(s) that need to be copied over to another platform or to other user(s).
- Choose ‘Add’ or ‘Add & Run’ next to the filter(s) to be copied.
- ‘Add’ will add the filter to the dashboard but will not query results.
- ‘Add & Run’ will automatically query results after the filter is added to the dashboard.
- Choose the ‘Create Filters’ option in the bottom right.
- For filters being added, choose the user(s) that the filter(s) are getting added for in the ‘User’ box. Filters added will appear on the user’s dashboard.
- User options only appear for accounts that are licensed for multiple users.
- Choose the desired platform(s) that filters are being copied to in the ‘Platform’ drop box.
- For filters being added, choose the user(s) that the filter(s) are getting added for in the ‘User’ box. Filters added will appear on the user’s dashboard.
- Confirm the additions on the page.
- Choose the ‘Save’ option in the bottom right to add the selected filters or choose ‘Back to Library’ to cancel.
Adding and Deleting in One Step
In the Filter Library, it is possible to add and delete filters in one step.
- Choose the box next to the filter(s) that need to be added or deleted.
- Choose ‘Add’ or ‘Add & Run’ from the drop-down menu in the ‘Save Action’ column next to the filters to add and choose the ‘Delete’ option next to the filters to remove.
- ‘Add’ will add the filter to the user’s dashboard but will not query results.
- ‘Add & Run’ will automatically query results after the filter is added to the user’s dashboard.
- Choose the ‘Create/Delete Filters’ option in the bottom right.
- For filters being added, choose the user(s) that the filter(s) are getting added for in the ‘User’ box. Filters added will appear on the user’s dashboard.
- Confirm the deletions and additions on the confirmation page.
- Choose the ‘Save’ option in the bottom right to delete and add the selected filters or choose ‘Back to Library’ to cancel.
Conclusion
The Filter Library provides an easy way to manage filters in Cloudingo including sharing filters between users and orgs. Use the library to clean up and manage dashboards.
Was this article helpful?
