Overview
Cloudingo is designed to find and eliminate duplicates in bulk using Dedupe Filters and Rules. However, there may be times when a need arises to search for one-off groups of records to merge or convert.
Maybe duplicates have been manually identified in the Salesforce org and there are no common field values to match. Or there may be a quick need to merge records and taking time to search through filters to find the group to merge is not feasible. The Quick Search feature will find the records using minimal matching criteria (even just the record IDs if that is all that has been provided) preventing the necessity to use a dedupe filter.
Navigation
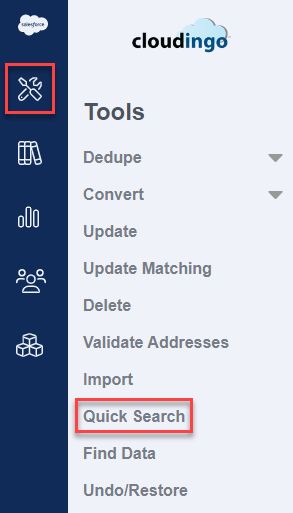
Choose the ‘Tools’ → ‘Quick Search’ option from the left-hand-side navigation window.
Step 1: Select an object

- Choose an object to perform the search against.
- Options include Lead, Contact, Account, Person Account, or any custom object enabled for merge.
Step 2: Select conditions for searching
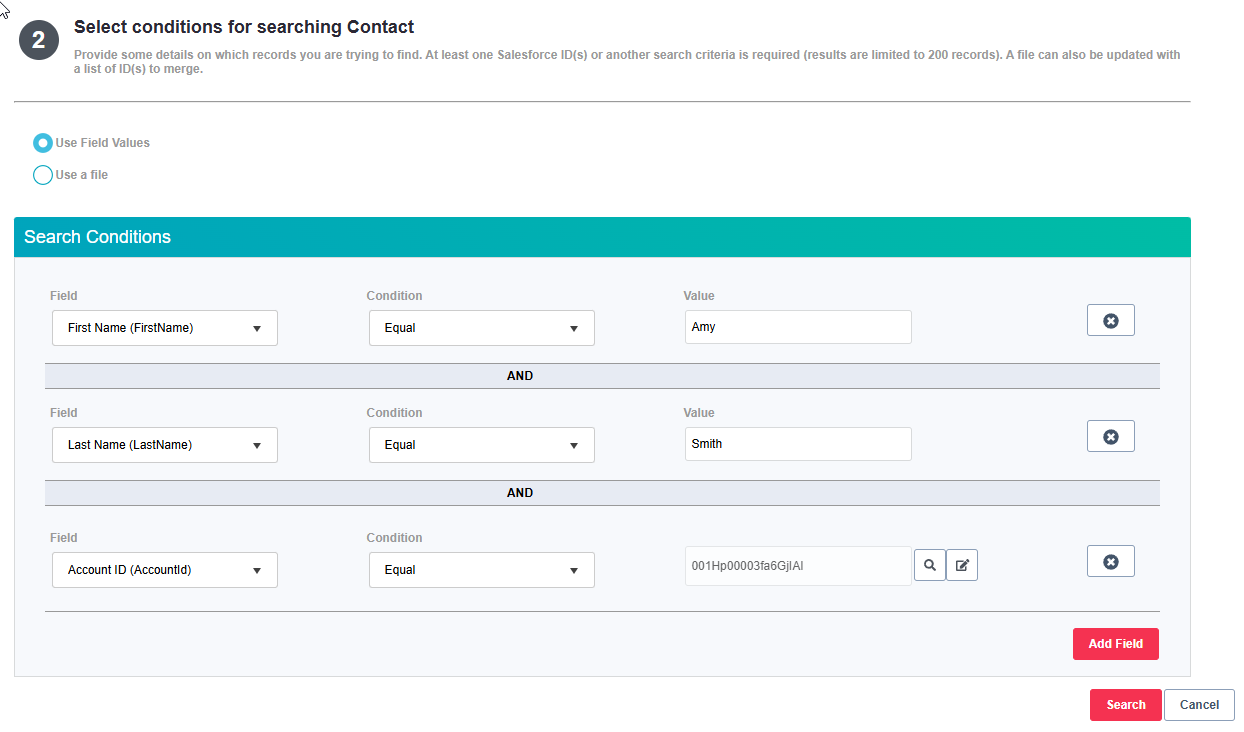
Use Field Values
- Cloudingo will pre-set fields and conditions to give users a recommended starting point for filtering criteria.
- To delete a condition, choose the ‘x’ option to the far right for the field to be removed.
- To edit a condition, choose the existing drop box options and select the desired settings.
- Add Field: Choose the ‘Add Field’ option to add additional fields and criteria to locate the records.
- Field: Choose a standard or custom field from the field drop box.
- Condition: Choose a condition for searching (such as ‘Equal’, ‘Contains’, ‘Has No Value’, etc.).
- When using ‘Equal’, ‘Not Equal’, ‘Contains’, ‘Does not Contain’, ‘Starts With’, or ‘Ends With’, multiple values can be specified.
- Separate multiple values using a comma and no spaces.
- When using ‘Equal’ or ‘Not Equal’, the values must be entered exactly as they appear in Salesforce.
- When using ‘Equal’, ‘Not Equal’, ‘Contains’, ‘Does not Contain’, ‘Starts With’, or ‘Ends With’, multiple values can be specified.
- Value: Specify a value if applicable. Not all conditions require a value to be set.
- Choose 'Search' to begin the search.
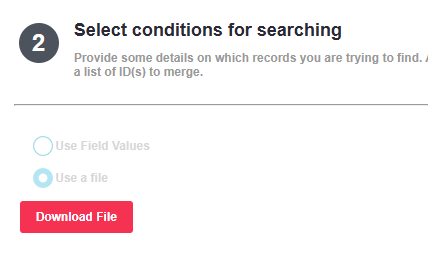
Use a file
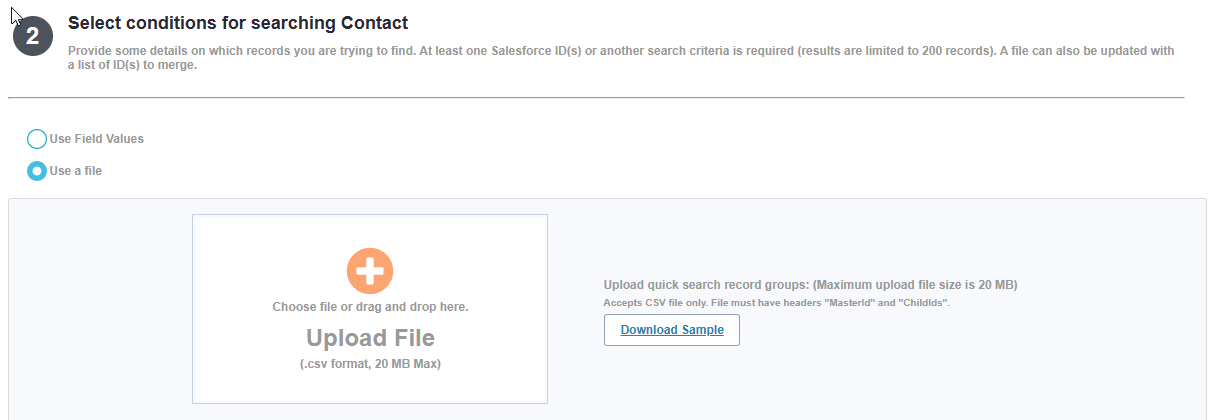
- Cloudingo allows you to upload a list of pre-determined record matches if the record IDs are already known.
- Create a CSV file with two columns ("MasterID" and "ChildIDs").
- Populate the rows in the file with the Master & Child record IDs that need to be merged together.
- If more than one Child record, separate the ID values by a comma (no spaces). Here is an example of what the file would look like:
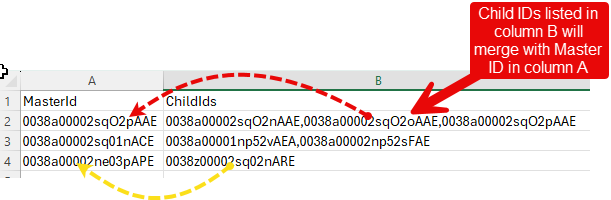
- If the master ID column value is left blank, the Child IDs will still merge.
- The rule chosen in Step 3 (described below) will determine the master record.
- Toggle to enable the 'Use a file' option.
- Upload the file.
- Search immediately begins after the file has been uploaded.
Step 3: Results
- If no matches are detected, revise the search conditions, and try again.
- If matches are detected, the number of matches detected will display.
- Choose the ‘View Results’ option to get into the merge preview page.

- Choose the ‘View Results’ option to get into the merge preview page.
- Change Rule: Ensure that the desired rule is applied to the results. Use the ‘Change Rule’ option to choose another rule.
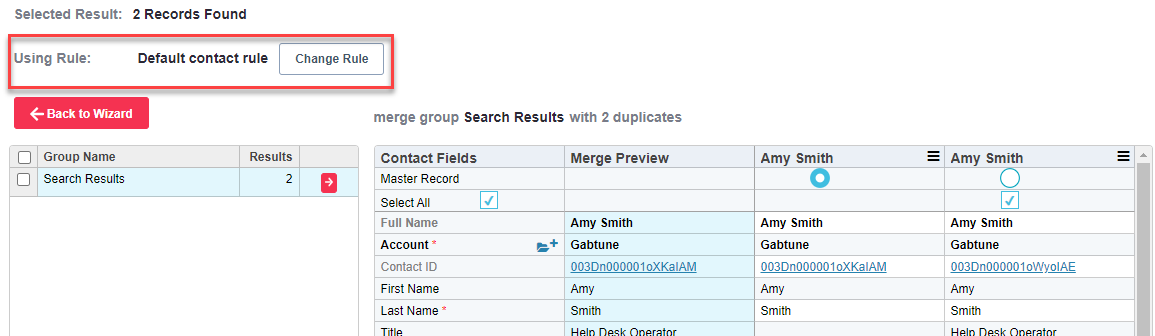
- The rule chosen will determine the master if the file's master value is blank.
- The selected rule determines how field values are chosen during the merge.
- Configuring a new rule for the Quick Search merges may be necessary if the master values should always be retained (even if blank in some cases).
- To prevent existing master field values from being overwritten, create a separate rule with no specific field rules configured if necessary.
- To prevent field values from being pulled in from non-master records when the master value is blank, ensure the rule is configured to 'never override the master' under the default rule settings.
- Merge Related Direct Accounts (visibility varies by license): When the 'Hybrid Merge' add-on feature is enabled on the Cloudingo account, an optional 'Merge Related Direct Accounts' checkbox will be available.
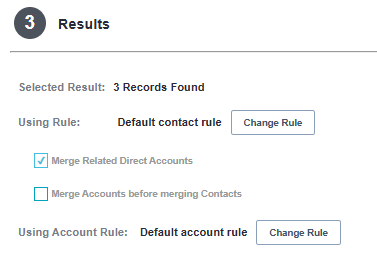
- This setting does not apply to all customers. It is most commonly used by non-profit customers using NPSP.
- Additional related Hybrid Merge settings will be available once the Merge Related Direct Accounts setting is enabled.
- Check Results for Accuracy: If only the desired records are pulled into the results, the records are ready to merge or convert.
- Choose the ‘Merge’ or ‘Convert’ option at the bottom of the page to manually merge/convert.

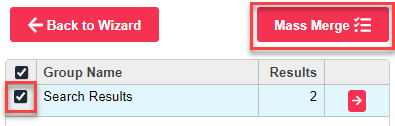
- Choose the checkbox next to each group of records to be merged and choose the ‘Mass Merge’ option.
- Choose the Select All checkbox to select all groups.
ii. Mass Merge will not retain any manual changes made on the page. If making manual edits before merging, use the manual 'Merge' option at the bottom of the page.
- Choose the Select All checkbox to select all groups.
- Choose the ‘Merge’ or ‘Convert’ option at the bottom of the page to manually merge/convert.
- If too many records are pulling into the results, choose the ‘Back to Wizard’ option to add additional matching criteria.
- For the quickest search, identify the desired records in the preview. Obtain the record IDs and use the record IDs for matching criteria.
- Merge Preview Settings: The merge preview settings at the top right are the same as a dedupe merge preview. See the Merge Preview – Accuracy Check help article for more detailed information on the settings below.

- Field Ordering and Style: Rearrange, bold, or hide/enable fields for viewing.
- Sort: Choose the display sort setting (oldest to newest or newest to oldest modified).
- Options: Set options to control how data is displayed or how rules get re-applied when deselecting records for merge.
Step 4: Match Criteria (Optional)
If the ‘Back to Wizard’ option gets chosen after performing the scan and viewing results, an additional step is provided to help users further limit records using matching criteria.
Note: This option is not available if using a file upload vs. criteria.
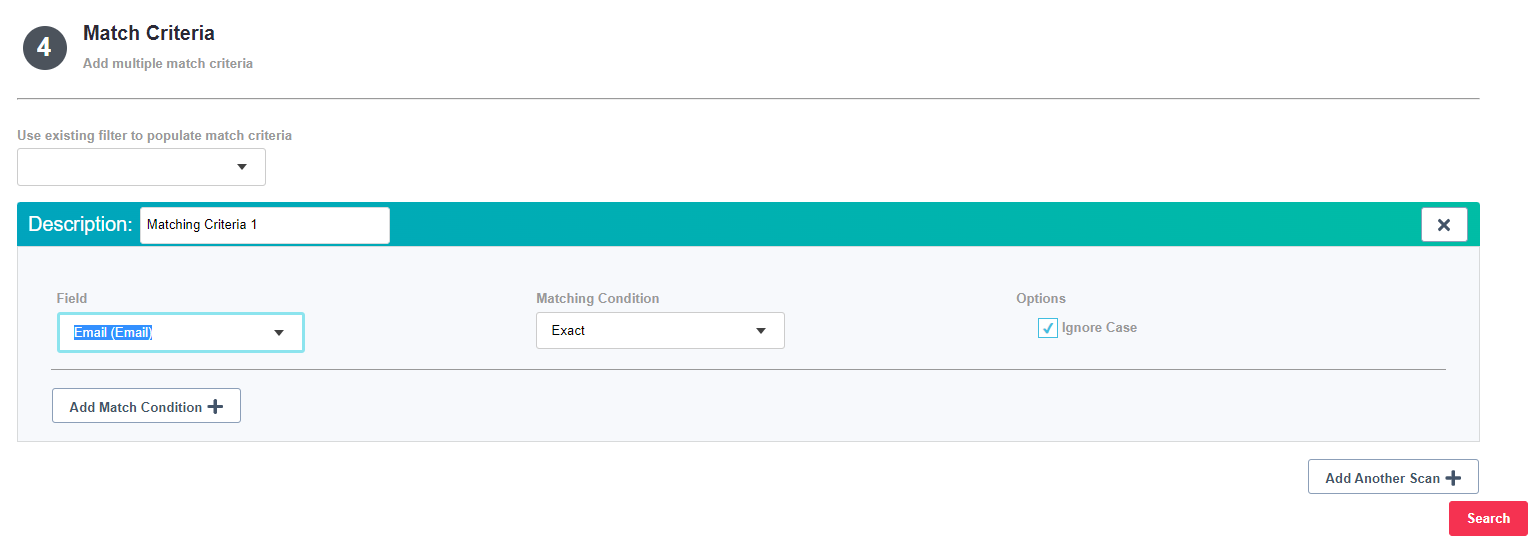
- Use existing filter to populate match criteria: Choose an existing dedupe filter to build the matching criteria (which pulls from Step 2 of the filter’s configuration).
- Matching criteria:
- Add a Scan: Choose this option to begin building the matching criteria.
- Field: Choose a standard or custom field from the field drop box.
- Matching Condition: Choose a matching condition (such as ‘Exact’, ‘Company Clean’, or ‘Fuzzy’).
- Options: Choose desired option settings (such as ‘Ignore Case’ or ‘Synonym Matching’)
- Add Match Condition: Choose this option to add additional matching criteria.
- Matching criteria uses ‘and’ logic and all records must meet the criteria to be identified.
- Add a Scan: Choose this option to begin building the matching criteria.
- Choose ‘Add Another Scan’ to set up additional criteria to perform multiple scans using different matching conditions and repeat the steps above.
- Choose ‘Search’ to start the new search and follow the instructions described earlier in Step 3.
Previous Results
- Choose the 'Previous Results' option at the top of the page to view past Quick Search jobs.

- Click 'View' next to any Quick Search past job to view results.

- For Quick Search jobs using files, a download option is available (in step two) to download the original file used.