- 17 Jun 2024
- 3 Minutes to read
-
PDF
Getting Started (Marketo)
- Updated on 17 Jun 2024
- 3 Minutes to read
-
PDF
Getting Started with Cloudingo
Getting started with Cloudingo is easy! Create an account, connect Cloudingo to Marketo, and begin cleaning up data.
Jump to quick connect!
Before connecting, know the Marketo permission requirements to determine if existing user permissions need to be modified or to determine which user to use for the connection.
Step 1. Create a Cloudingo Account
Go to the Cloudingo registration form here.
Fill out the form to create an account.
Registration must be done using a valid/deliverable email address.
The user will receive an email with an activation link to activate the Account.
The activation process will require a password to be set which will be used to log in later.
Step 2. Login and Connect Cloudingo to Marketo
Log in to Cloudingo using your Cloudingo username and password (email and password set during the registration/activation process).
Permission Requirements
The connected user must have read/write/update/delete permissions to some objects within Marketo. The user’s role must include permissions to:
Read-Write Person/Lead
Read-Write Activity
Read-Write Activity Metadata
Read-Only Asset
Read-Write Custom Object
The object will be listed as “Person” or “Lead” in the role list depending on the instance.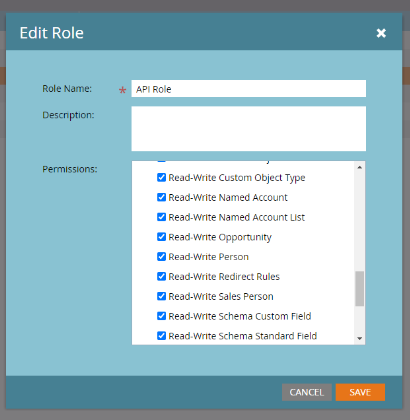
Additional permissions are required for various endpoints. The requirements can be found here.
Quick Connect Guide
Enter connection details.
Open Marketo simultaneously to copy/paste values into the Cloudingo connection page.
See full connection details below for more help.
Connecting Cloudingo
Choose ‘Add Account’ from the platform menu (top left).
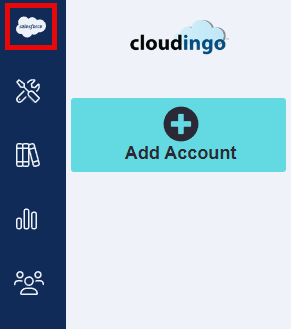
If prompted to add a new Salesforce or Adoboe Marketo Engage instance, click the box for the Marketo instance.
Enter connection details. Open Marketo simultaneously to copy/paste values into the Cloudingo connection page.
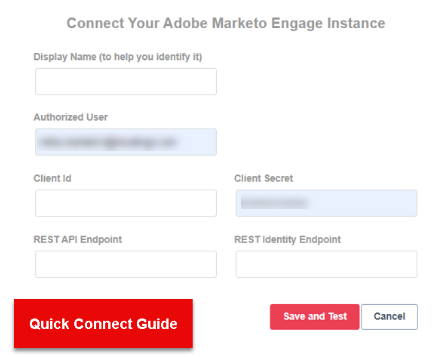
Display Name: Provide the connection with a display name.
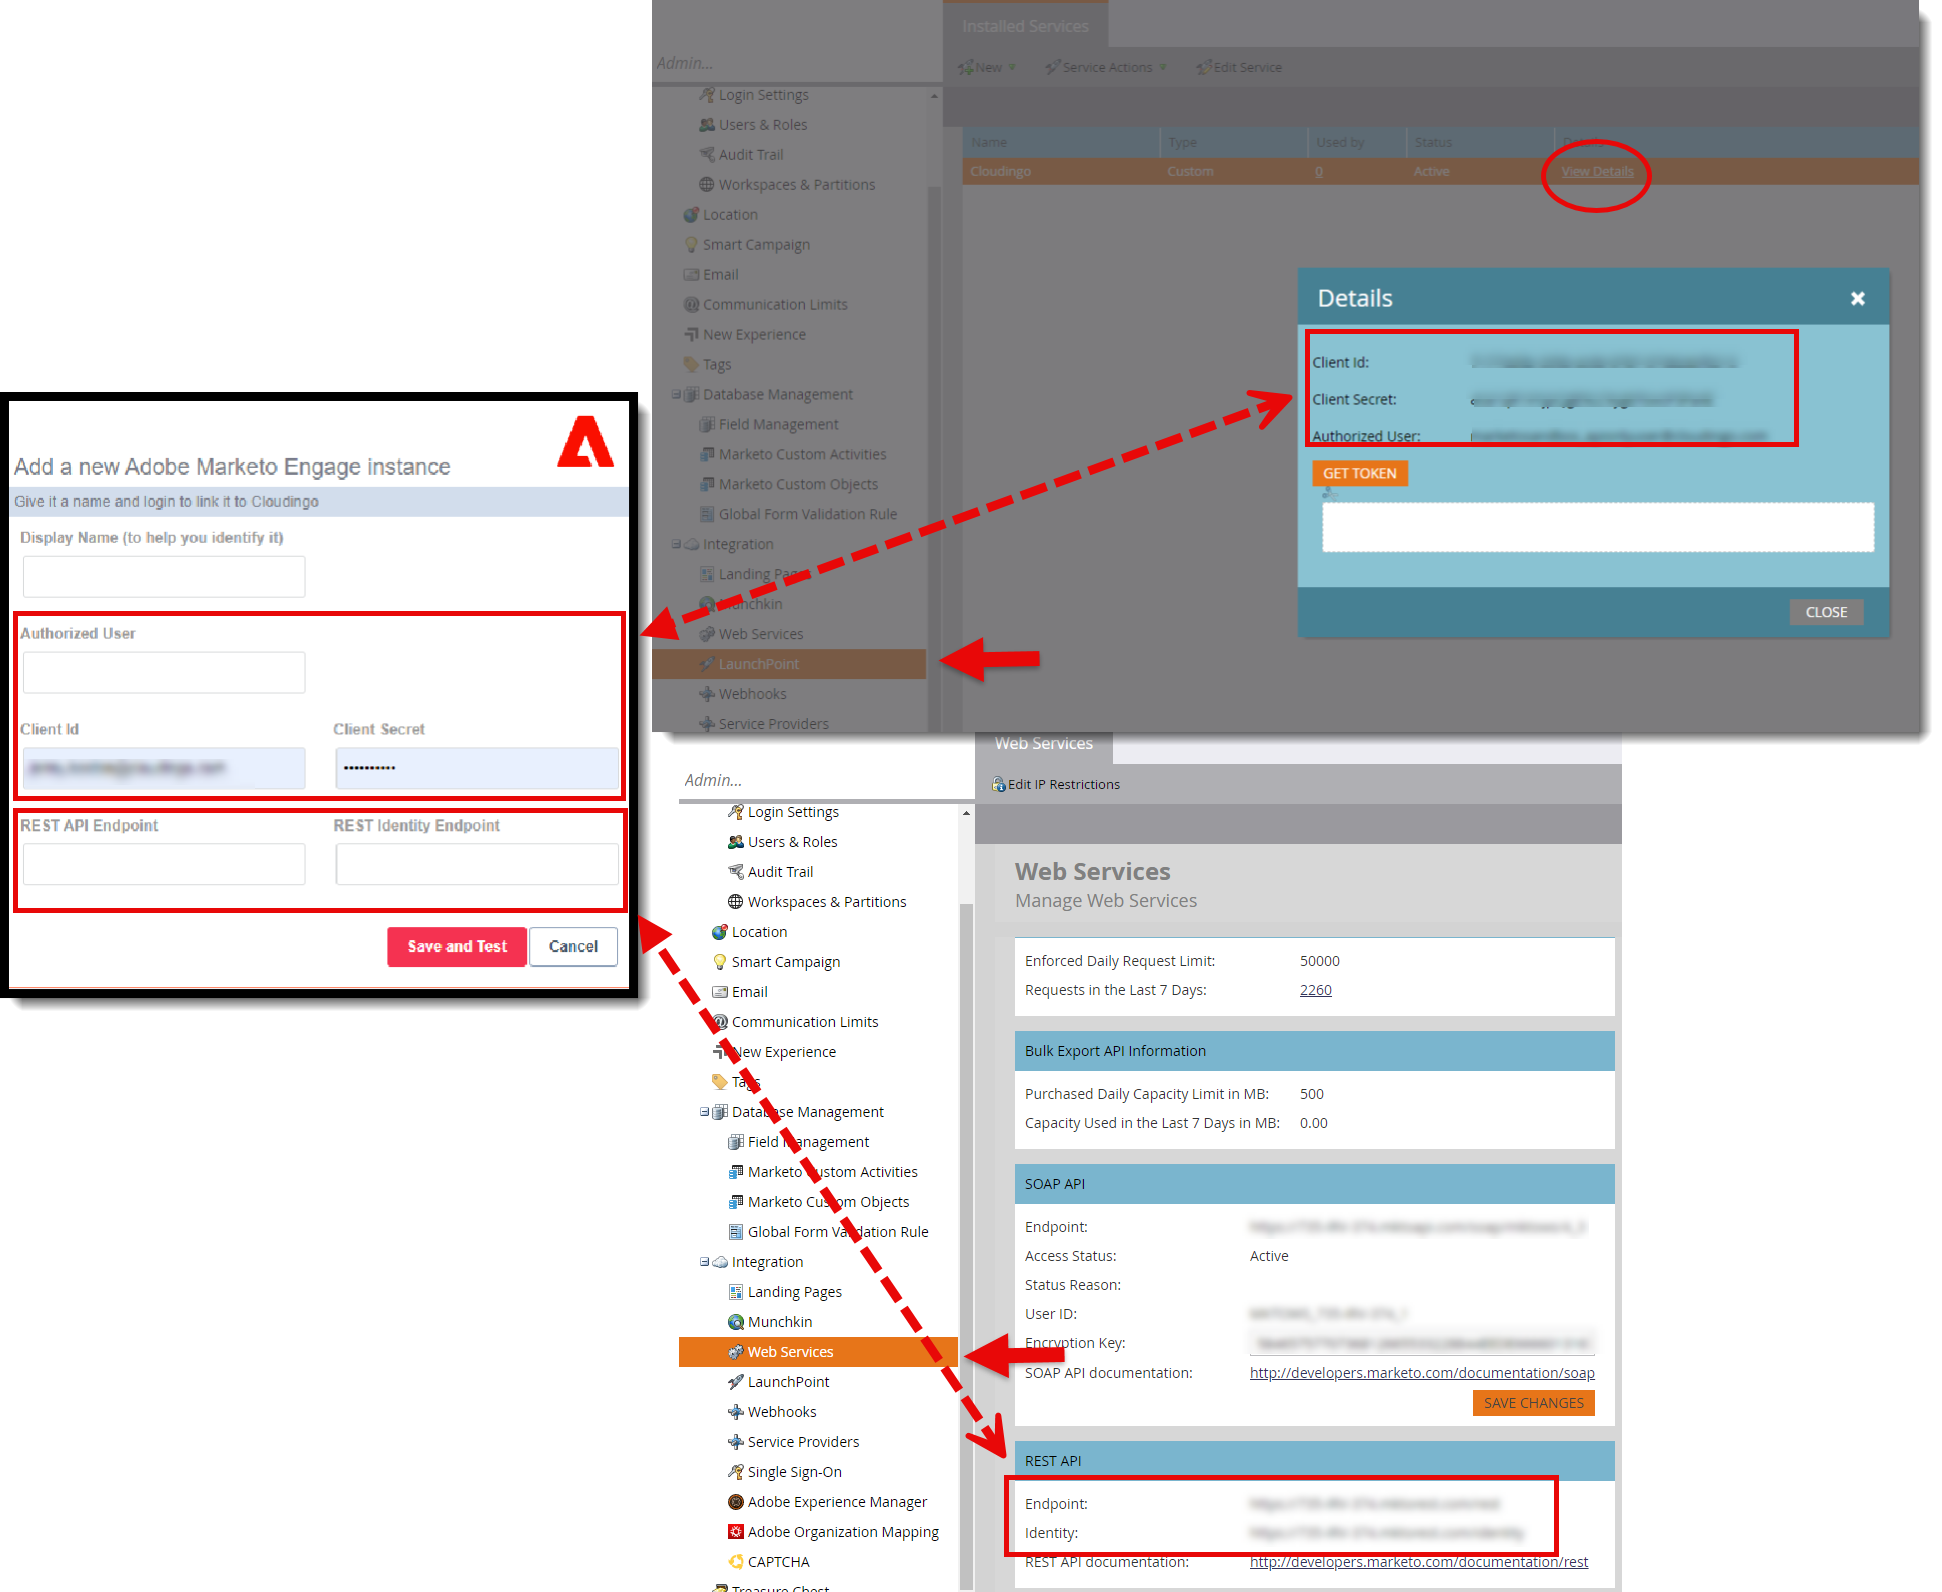
Authorized User, Client ID, and Client Secret can be obtained within Marketo under Admin → Integration → LaunchPoint.
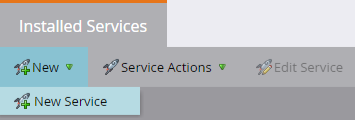
Choose New → New Service to create a new LaunchPoint if one does not already exist for Cloudingo.
Display Name: Type in “Cloudingo”.
Service: Set to “Custom”.
Description: Give the service a description.
API Only User: Choose the desired API user for the Cloudingo connection.
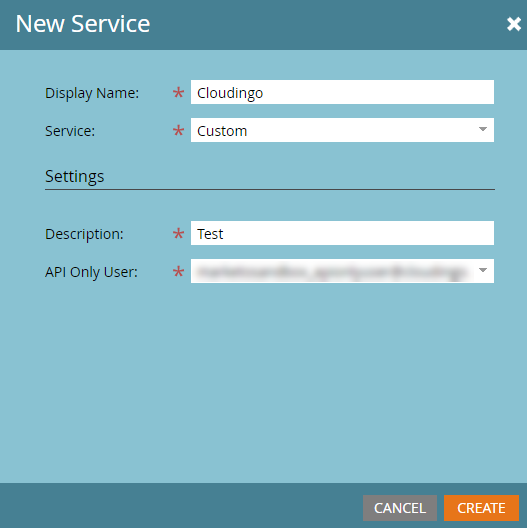
Choose “Create” to save the new service. Once saved, the Client ID, Authorized User, and Client Secret details will be accessible to copy and paste into Cloudingo’s connection page.
Locate Cloudingo in the Installed Services list and click the “View Details” link.

REST API Endpoint and REST Identity Endpoint can be obtained within Marketo under Admin → Integration → Web Services.
Organizations that have IP Restrictions enabled will need to whitelist Cloudingo’s IP ranges (starting IP Address 169.61.150.226 to Ending IP Address 169.61.150.238).
Choose “Save and Test” to save and test the connection to Marketo.
Step 3. Initial Indexing
Cloudingo will index the data and field schema and then generate a dashboard of default filters showing the initial scan results.
No changes are being made to the data at this point.
API Usage Guidelines
Indexing
Process: Due to the API limitations, indexing a Marketo org can be more complex with larger instances.
Initial Query: Starts with the current date, queries the most recent data, and samples the data based on max and min IDs.
Data Concentration: Based on the sampled data, Cloudingo determines the data concentration and whether to use the REST or Bulk API for further data pulls.
Limit Management: If nearing the Bulk or REST API limits, indexing will pause and resume during the hourly maintenance window, starting from the last indexed point.
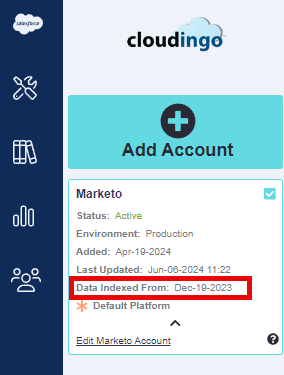
Incomplete Indexing Notification: An additional date in the platform details indicates incomplete data indexing. This date will disappear once all data is indexed.
Syncs/Scans
Marketo Syncs: Marketo syncs with Cloudingo using a server-to-server polling method to keep data in sync after the initial indexing. Syncs will pull information on records created/updated/deleted within Marketo to notify Cloudingo which records to re-evaluate when calculating filter results to identify potential matches.
Default Setting: Syncs run hourly.
REST API
Limit: 50,000 calls per calendar day, reset at 12 AM US CST.
This is not a rolling threshold; it is reset daily at a set time.
Data Query: Only preset and custom fields can be queried.
Default fields: cookies, email, facebookId, ID, leadPartitionId, linkedInId, sfdcAccountID, sfdcContactId, sfdcLeadId, sfdcLeadOwnerId, sfdcOppotyId, twitterId.
Workaround: Create a custom formula field to make a value searchable.
Bulk API
Limit: 500 MB per day, reset at 12 AM US CST.
Data Query: Cannot query data for more than a 30-day range.
Cloudingo API Limits
Usage: By default, Cloudingo uses up to 50% of available API limits.
Threshold: Once the 50% threshold is reached, indexing and scans will not pull more data until usage drops below 50%.
Step 4. Use Existing Filters or Create New Ones
Use prebuilt filters from Cloudingo or create new ones to identify duplicate records in Marketo.
Step 5. Set up Rules for Merging Records
Set up rules defining the master record selection and field value choices based on business requirements.
Step 6. Automate Jobs and Set Filters to Run on a Schedule
Start automation manually or use schedules to process merges. Make sure to preview results for accuracy before automating.
Step 7. Set Up Additional Users (optional)
For multi-user license users, set up additional users to manage Marketo data using Cloudingo.
.png)


