Overview
There may be instances when certain records in the filter results should not be merged or converted due to business rules or data structure. This article will advise how to avoid re-evaluating the same records deemed unmergeable over and over again the next time the filter is reviewed.
Navigation
Choose the ‘Libraries’ → ‘Excluded Records’ option from the left-hand-side navigation bar.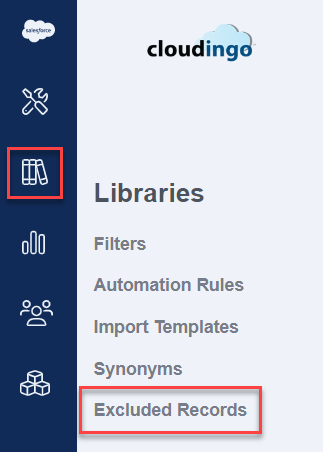
Tighten Up Filters
Before using any other solution, check if the filter can be tightened up by adding additional field matches or scope settings to limit results on the undesired records.
- Edit the filter, and in Step 2 of the filter configuration, add additional field-matching criteria to tighten up the filter results.
- If the filter is already configured for manual merge and cannot be tightened on matching criteria, consider adding scope to limit or exclude the records that should not pull in for merge.
- Edit the filter, and in Step 3 or Step 4 of the filter configuration, add additional field logic to exclude certain criteria (such as Record Type is not equal to a certain value).
- If field criteria cannot be used to exclude the records, consider if it makes sense to exclude the particular records (such as email does not contain ‘gmail’, or ‘yahoo’ for example).
- If no additional criteria can be added safely, use another solution below.
Note: This solution is usually applicable for manual filters and not those using automation or mass merge.
Set a 'Last Reviewed' Date
The best way to handle manual filters that cannot be tightened up is to use a date setting within the filter configuration.
- Perform a one-time big initial cleanup on the filter to merge everything that needs to be merged and skip over the ones that cannot be merged.
- Set a scope setting on the filter to limit the groups in Step 4 of the filter configuration to only display groups where at least one or more of the records within the group have been created or modified since the last time the filter results were manually reviewed.
- Edit the current filter and go to Step 4.
- Choose to add a new rule.
- Select ‘Modified Date’ as the field (this will include both created & modified records since the modified date is set when a record is created).
- Choose a rule to define a date and how far back the filter should check for matches.
- If using a date setting rather than a specific date (such as last 7 days), keep track of when the filter results were last manually reviewed in order to know when to log in and manage the results next time.
- Consider setting a schedule (ex: every Monday) and set the filter to only pull in results where the date is greater than 7 days. Ensure that you monitor the filter results regularly every 7 days (or the frequency you set).
- Or update the modified date in tab 4 each time after reviewing the filter results so that it is pre-set the next time the filter results are calculated.
- If using a date setting rather than a specific date (such as last 7 days), keep track of when the filter results were last manually reviewed in order to know when to log in and manage the results next time.
Exclude Records
Records can be hidden or protected within Cloudingo, but consider potential consequences that may arise on future duplicates coming into Salesforce. This solution is ideal for hiding or protecting very specific records that should never be touched or automated (even if future record matches come into Salesforce).
Protected Records
Protected records still appear in filter results, but will not be automatically merged, converted, updated, or deleted.
- To protect a record:
- To protect records individually one at a time, use the Merge Preview page. While the records are loaded in view, click on the menu option on the header row for the desired record and choose ‘Protect Record’.

- To protect a list of records, use the upload feature. Make sure to select the ‘Protected Records’ tab.
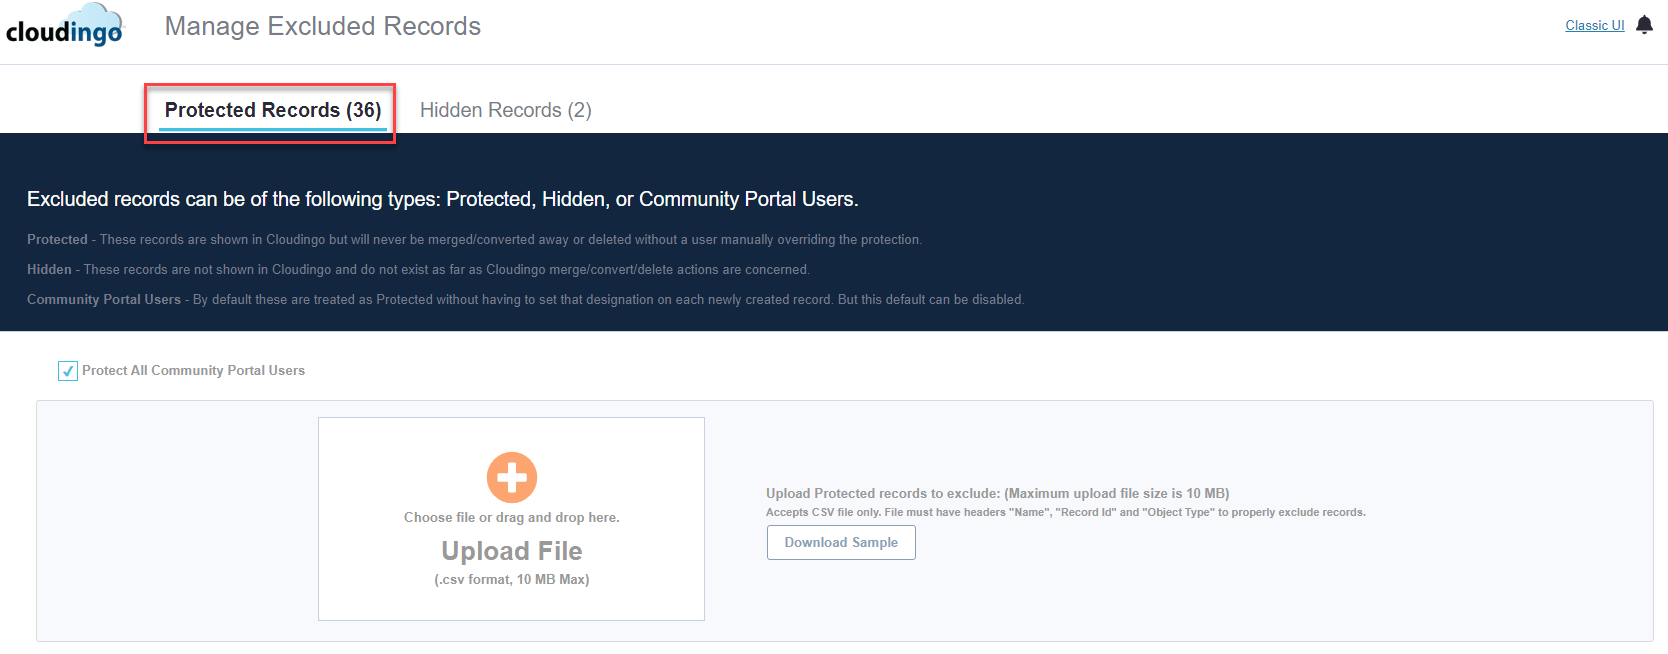 Then use the 'Upload File' option to attach the list. The file must be in CSV format and headers must include the following:
 - Name: used to identify the record being excluded (user defined)
- Record ID: the 15- or 18-digit Salesforce record ID
- Object Type: the object for the record (ex: Lead, Contact, Account, or Person Account).
- To protect records individually one at a time, use the Merge Preview page. While the records are loaded in view, click on the menu option on the header row for the desired record and choose ‘Protect Record’.
- To unprotect a record:
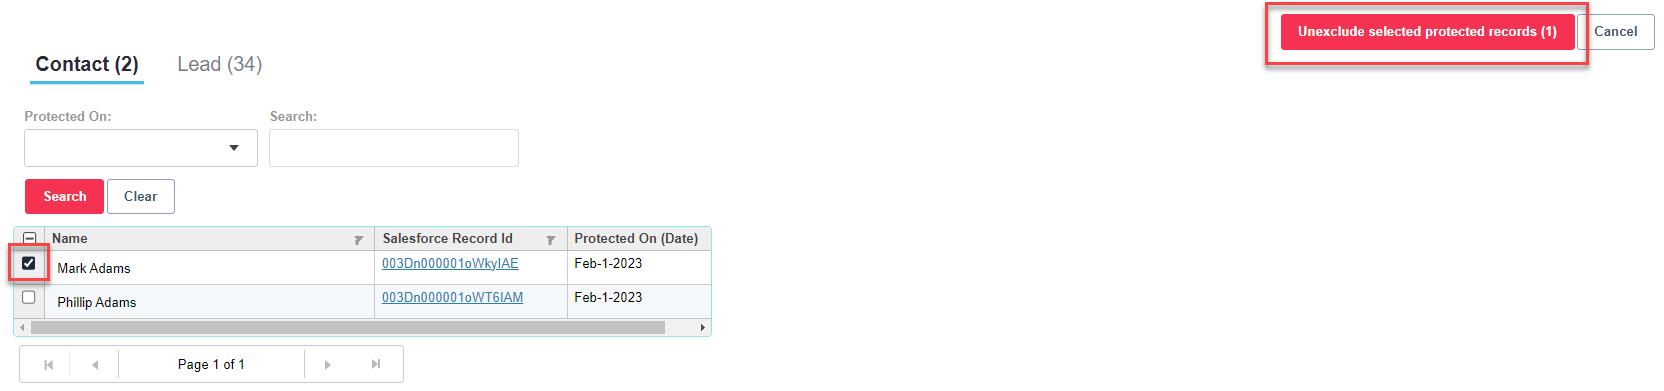
- Load the Protected Records list (make sure to toggle to the 'Protected Records' tab).
- Use the search if necessary to find the records that need to be unprotected.
- Choose the box next to the record(s) and choose the ‘Unexclude selected protected records’ option.
Portal Users
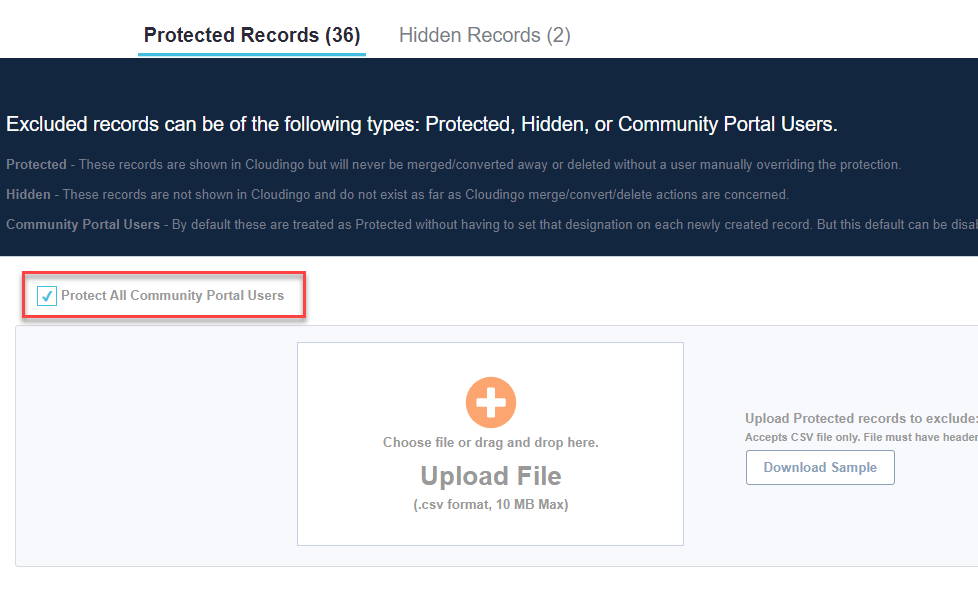
Portal users are marked as protected by default using the ‘Protect All Community Portal Users’ option.
- A list is not needed to protect portal users.
- Portal Users can be designated as the master record using the ‘Protected Record’ master definition within the rule assigned to the filter. Rules can also be configured with an Exception to exclude automatically merging protected records.
- Filter configurations can exclude merging on groups where one or more records has a portal user (in Step 4 of the filter configuration).
- Cloudingo will detect if the Salesforce org is configured for Portal user access and enable a sync setting to force the User data to sync with Cloudingo daily.
- Directly force the User sync on the Merge Preview page using the ‘Refresh Portal Users’ option.

- Directly force the User sync on the Merge Preview page using the ‘Refresh Portal Users’ option.
- To unprotect portal users, deselect the 'Protect All Community Portal Users' option in the Excluded Records section.
- Salesforce may be configured to have restrictions that prevent the deletion of portal users as well that cannot be bypassed by Cloudingo. In these cases, disable portal access on the deleting record before attempting to merge.
- Open the Merge Preview page for the group of records being attempted for merge.
- Records with a portal association will display an icon next to the header indicating the record is protected and a portal user.
- Open the record in Salesforce.
- Choose the record ID link from within the preview for quick access.
- Disable portal access for the record in Salesforce.
- Choose the ‘Refresh Portal Users’ option in Cloudingo’s merge preview.
- Click the red arrow on the group of records to be merged to refresh the records. The portal designation should be reflected after making the change in Salesforce.
- Merge.
- Keep in mind that all non-master records with a portal designation will need to be deactivated in the portal first.
- Master portal designations can be retained.
- Open the Merge Preview page for the group of records being attempted for merge.
- Salesforce may be configured to have restrictions that prevent the deletion of portal users as well that cannot be bypassed by Cloudingo. In these cases, disable portal access on the deleting record before attempting to merge.
Hidden Records
Hidden records will be ignored by Cloudingo entirely and records will no longer appear in filter results. Hidden records will not be merged, converted, updated, or deleted.
- To hide a record:
- To hide records individually one at a time, use the Merge Preview page. While the records are loaded in view, click on the menu option on the header row for the desired record and choose ‘Hide Record’.
- To hide a list of records, use the upload feature. Make sure to select the ‘Hidden Records’ tab.
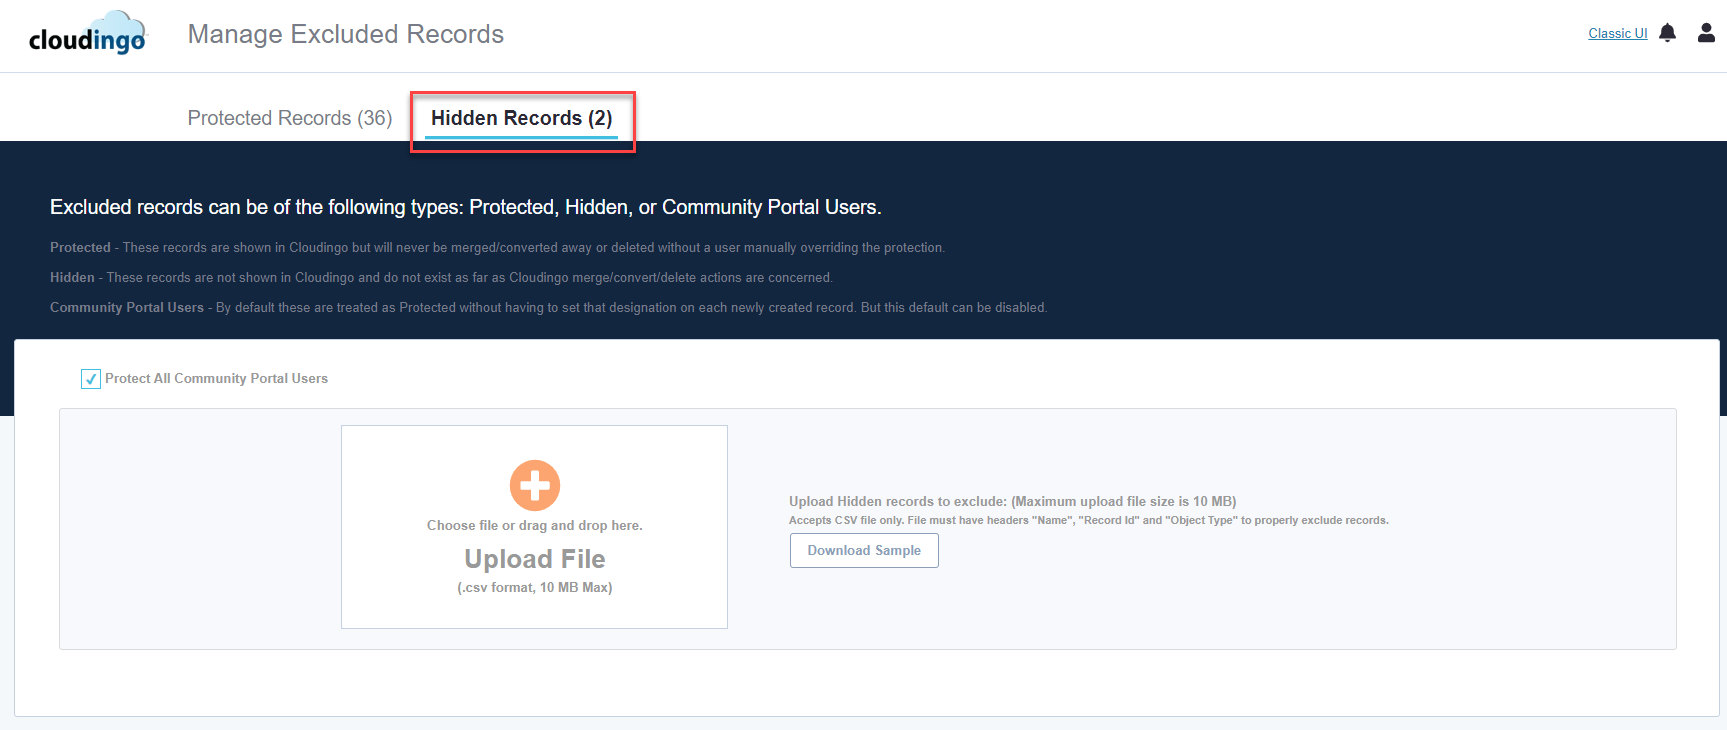 Then use the ‘Upload File’ option to attach the list. The file must be in CSV format and headers must include the following:
- Name: used to identify the record being excluded (user defined)
- Record ID: the 15- or 18-digit Salesforce record ID
- Object Type: the object for the record (ex: Lead, Contact, Account, or Person Account).
- To unhide a record:
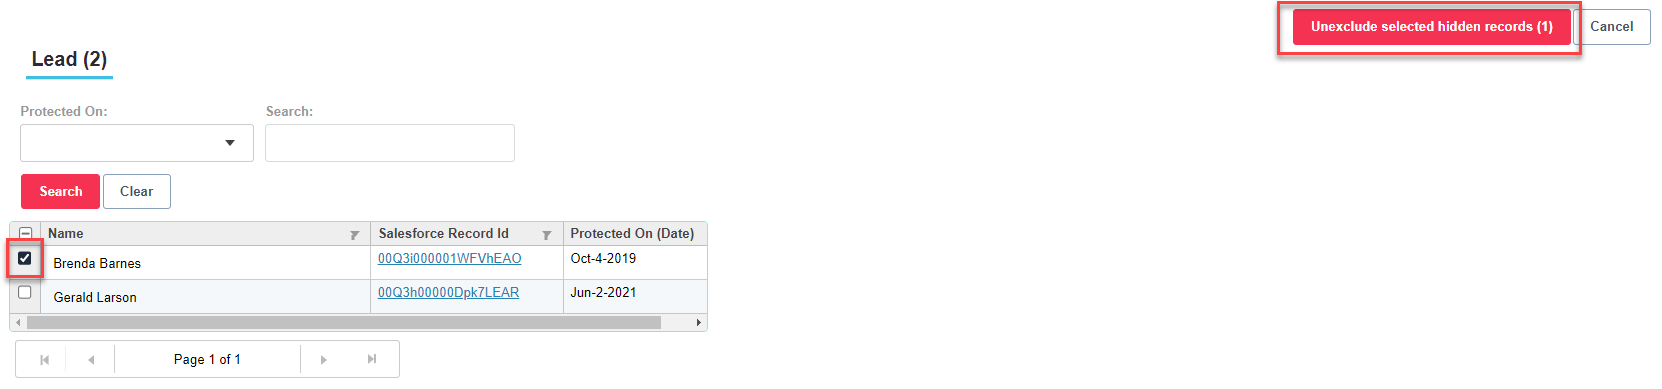
- Load the Hidden Records list (make sure to toggle to the 'Hidden Records' tab).
- Use the search if necessary to find the records that need to be unhidden.
- Choose the box next to the record(s) and choose the ‘Unexclude selected hidden records’ option.