Overview
Import Templates are a feature of Cloudingo's Rapid Import and are available with a Professional or Enterprise license. This feature can be useful if using the same file formats and import options for uploads frequently. Import Templates save specialized import settings and automation rules, which can be used to automate the entire import process for future uploads. Templates can be created in the Import Template Library and can be individually owned or shared with other users. However, it is important to be familiarized with the normal Cloudingo Import Tool process before attempting to set up an import template for automation.
Navigation
- There are two ways to get into Import Templates.
- Choose the ‘Libraries’ → ‘Import Templates’ option from the left-hand-side navigation options.

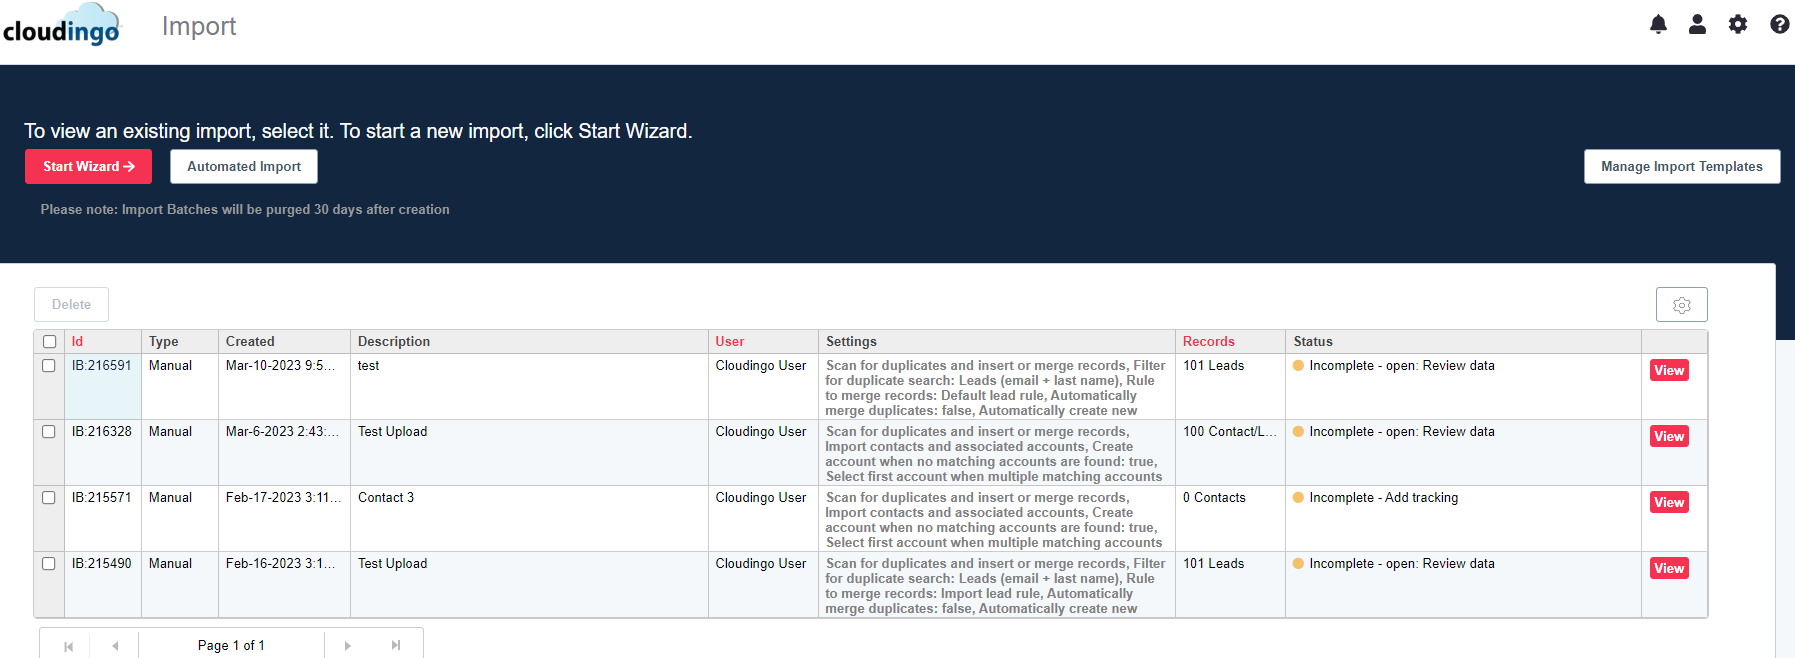
- Choose ‘Manage Import Templates’ from the import dashboard directly.

- Choose the ‘Libraries’ → ‘Import Templates’ option from the left-hand-side navigation options.
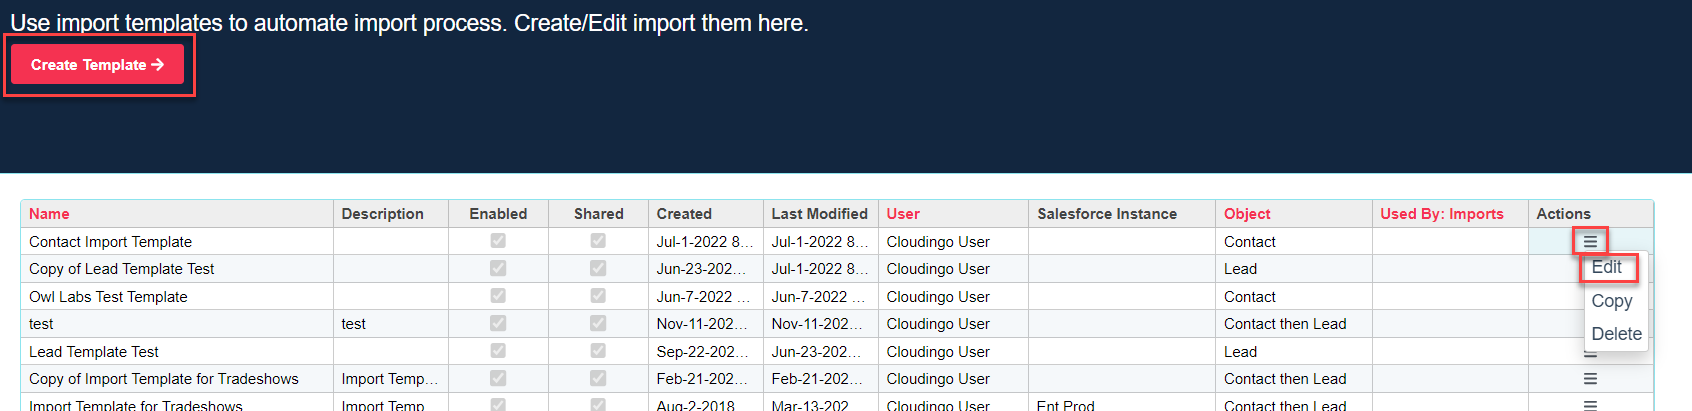
- Choose ‘Create Template’ to create a new import template.
- Choose ‘Edit’ under the ‘Actions’ column next to a specific template to edit an existing template.
- Edit default scanning options as necessary.
- Update campaigns attached as necessary.
- Update mappings as necessary.
- Choose ‘Copy’ under the ‘Actions’ column next to a specific template to copy an existing template and create a new one.
- Give the new template a descriptive name and adjust settings as necessary.
- Choose ‘Delete’ under the ‘Actions’ column next to a specific template to delete an existing template.
- Any files pending import using the template will not process if the associated template is deleted.
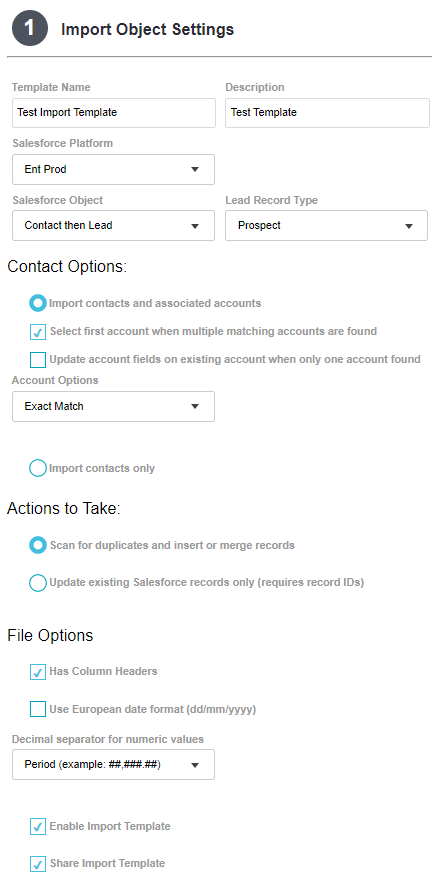
Step 1: Import Object Settings
When setting up this section, use the same settings normally chosen during the regular import process.
- Template Name: Give the template a descriptive name.
- Description (optional): Give a brief description of the template.
- Salesforce Platform: Choose the environment that the template is getting created for.
- Salesforce Object: Choose the object for the template.
- Record Type: Choose the default record type to apply to newly inserted records.
- Option only appears if using record types in the Salesforce org.
- Actions to Take: Options vary depending on the Salesforce object chosen. Visit the import-specific help article for more help.
- File Options: Choose the file option settings for column headers, date formatting, and decimal separators.
- Enable Import Template: Leave checked to use the template for future use. Unchecking will disable the template.
- Share Import Template: Choose to share the template with other users.
Step 2: Tracking Action Settings
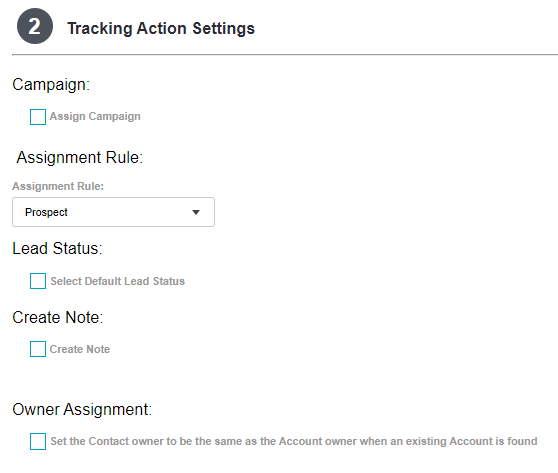
- Campaign: Choose Campaign, Status, and Create/Update options as applicable.
- If assigning a campaign, editing the existing template will be required to change the campaign or status for future uploads.
- Assign Rule: Choose the default lead assignment rule if applicable.
- The Salesforce default lead assignment rule gets applied if no setting is chosen.
- Option only appears on import templates that scan against Leads and for organizations that use multiple Lead Assignment rules.
- If assignment rules need to get applied to merged records, please contact the Cloudingo Support Team.
- Default Lead Status: Choose the default lead status if applicable.
- The Salesforce default lead status gets applied if no setting is chosen.
- Option only appears on import templates that scan against Leads.
- Create Note: Choose to generate a new note on all merged or imported records.
- Notes take up space in Salesforce and are not searchable.
- Owner Assignment: Choose to set Contact owner the same as Account owner if applicable when an existing Account is identified.
- Option only appears on import templates that scan against Contacts.
Step 3: Import Mapping Settings
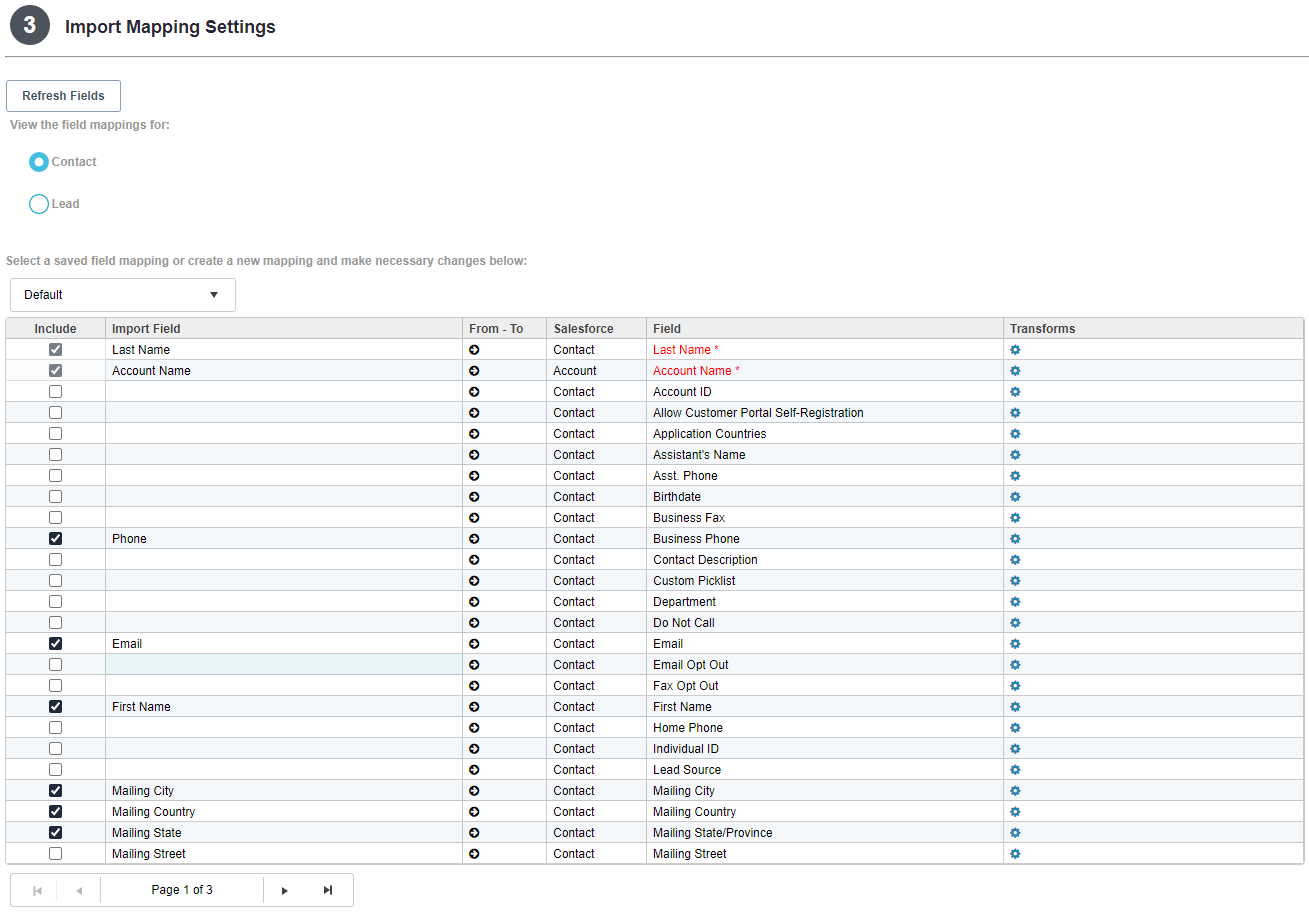
- Use a previously saved mapping to map all necessary fields using the saved field mapping drop box.
- Or map individual fields from the import file to their corresponding Salesforce fields.
- Use the ‘Refresh Fields’ button at the top of step 3 if a field is not showing in the target field box.
- Fields that are not editable in Salesforce cannot be mapped.
- A file is not uploaded when creating import templates. Typing in the column header for each import field is required and must be entered exactly as it appears in the file template.
- Consider saving mappings during manual import for easier configuration when setting up templates.
- Use the transforms option in the 'Transforms' column to set up any formatting or lookup settings for the fields.
- Use the ‘Refresh Fields’ button at the top of step 3 if a field is not showing in the target field box.
Step 4: Import Preview & Scan Dedupe Settings
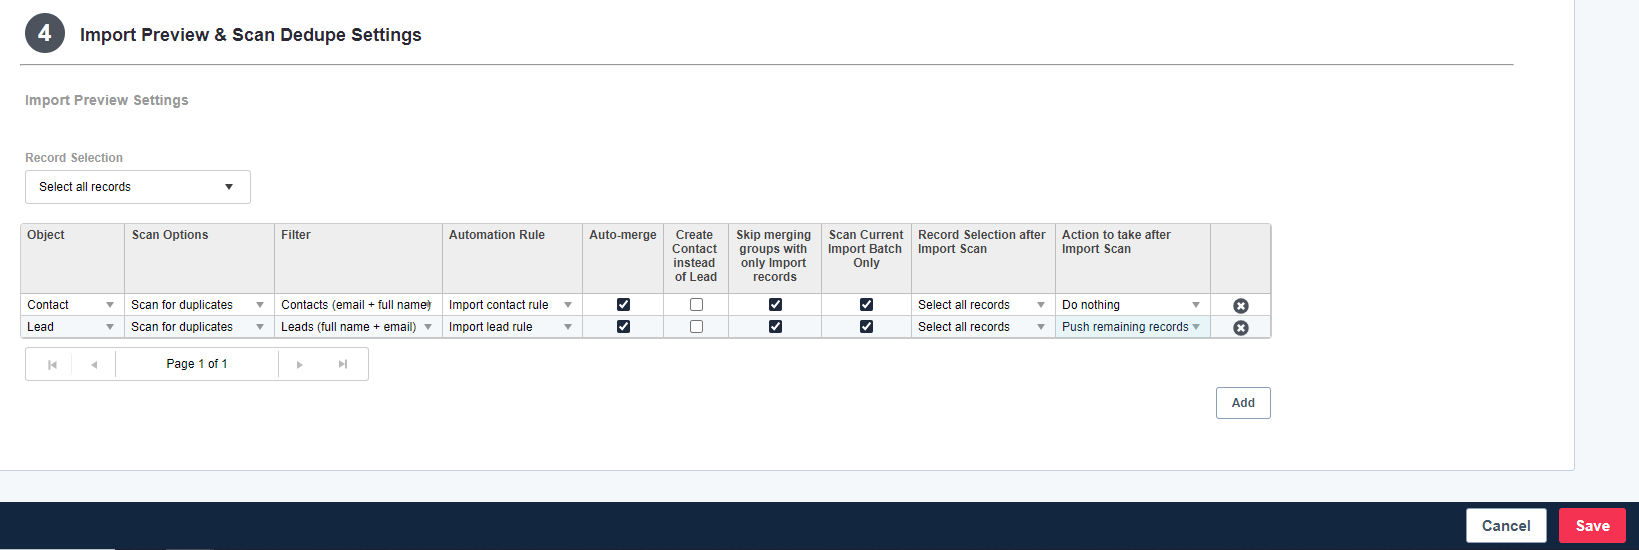
This step defines import steps 5 and 6 from the normal import process into an automated setting configuration.
- Record Selection: Choose ‘Select all records’ or ‘Select Records with no errors’ to select which records to include in the scan.
- Records with errors could have potential problems in the file’s data or file formatting.
- Errors are viewable in the import wizard after the template automation is complete.
- Choose to bypass records with errors or continue the process with those records.
- Option is the same as ‘Select All’ in Step 6 of the import process but filtering out only records without errors.
- Begin Steps: Scan settings run in the order configured. Each step is defined in a new scan iteration (row) in the settings. Choose the ‘Add’ option to add the first or additional scans to configure the scan/rescan settings. Add scans using the same options that are normally chosen during a manual import.
- Object: Choose the object to scan against (options appear if using multi-object import).
- Scan Options: Choose the option normally chosen during Step 5 for each scan/rescan.
- Scan for duplicates.
- Do nothing and let me manually decide what to push to Salesforce.
- Don’t scan for duplicates; just push all records automatically.
- Filter: Choose the filter normally chosen during Step 5 for each scan/rescan.
- Automation Rule: Choose the rule normally chosen during Step 5 for each scan/rescan.
- Auto-merge: Choose the option normally chosen during Step 5 for each scan/rescan.
- Auto-push Unique: Choose the option normally chosen during Step 5 for each scan/rescan.
- For multi-object imports, when configuring a rescan option, this setting is equivalent to the ‘Push Contacts instead of Leads when Matching Account is found’ setting in Step 5 of the import process.
- Skip merging groups with only Import records: Choose the option normally chosen during Step 5 of the import process for each scan/rescan.
- Scan Current Import Batch Only: Choose the option normally chosen during Step 5 of the import process for each scan/rescan.
- Record Selection after Import Scan: Choose a record selection option (all or without errors) to choose which remaining records to include in the scan(s).
- Action to take after Import Scan: Choose the option that fits the manual process normally taken after performing the scan/rescan. Set this option for each scan/rescan.
- Push Remaining Records: Pushes all remaining records into Salesforce as new.
- This is a final step option and future Rescan options cannot be configured when chosen.
- Delete Remaining Import Records: Deletes all remaining records not already managed from the file upload.
- This is a final step option and future Rescan options cannot be configured when chosen.
- Delete Import Records with Salesforce Duplicates: Deletes any record that has a detected Salesforce duplicate from the file upload. All other records (Unique or Import File Only duplicates) will remain in the file upload.
- Additional Rescan options can be configured when chosen.
- Do Nothing: Records from the file upload are not pushed or deleted.
- This option simply allows for additional Rescan options without taking any action between scans (other than auto-merge if chosen).
- This is the most common setting until all scans are completed.
- Push Remaining Records: Pushes all remaining records into Salesforce as new.
Looking at an Example
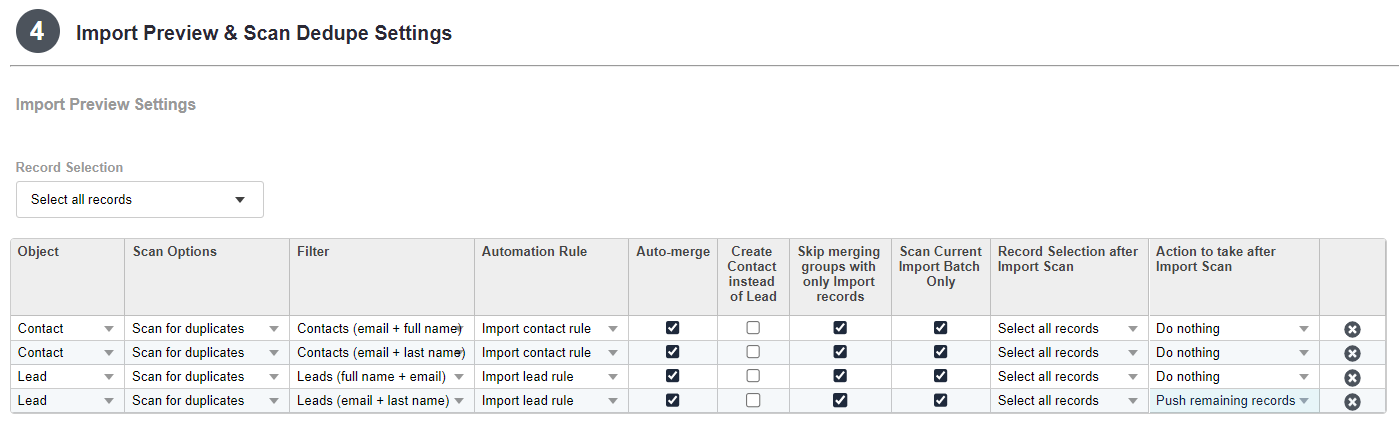
In this example, import automation will run through the following:
- First Scan: Scans Contacts using the ’Contacts (email + full name)’ filter and ‘Import Contact rule’. Import records with a Salesforce match detected will automatically merge, but no new records are pushed in new to Salesforce. The duplicate scan ignores any other file uploads.
- Second Scan: Scans the remaining records against Contacts using the ‘Contacts (email + last name)’ filter and ‘Import Contact rule’. Import records with a Salesforce match detected will automatically merge, but no new records are pushed in new to Salesforce. The duplicate scan ignores any other file uploads.
- Third Scan: Scans the remaining records against Leads using the ‘Lead (full name + email)’ filter & ‘Import Lead rule’. Import records with a Salesforce match detected will automatically merge, but no new records are pushed in new to Salesforce. The duplicate scan ignores any other file uploads.
- Fourth Scan: Scans the remaining records against Leads using the ‘Leads (email + last name)’ filter & ‘Import Lead rule’. Import records with a Salesforce match detected will automatically merge. Any records remaining will be pushed in new to Salesforces. Import records duplicated within the file only (no Salesforce match) will be merged and pushed in new to Salesforce.
- The ‘Action to take after import scan’ setting pushes all remaining records in as Leads.
- This includes unique records as well as import file duplicates if the ‘Skip Merging Groups with Import Records only’ option is deselected.
- The ‘Action to take after import scan’ setting pushes all remaining records in as Leads.
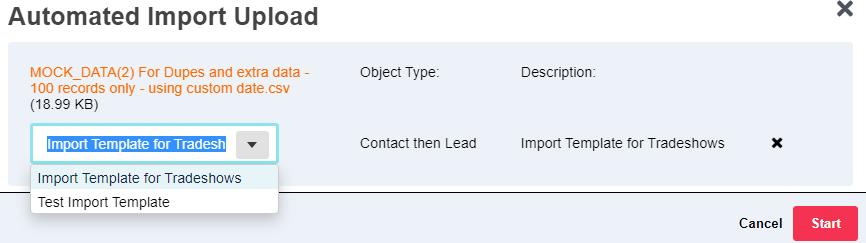
Automating Imports
- Navigate to the Import Dashboard ('Tools' → 'Import') and choose ‘Automated Import’.

- Choose the plus sign to browse for the upload file in the ‘Upload File’ box or drag/drop the file to the selected area.
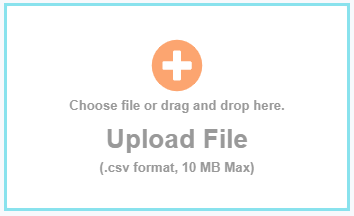
- Files cannot exceed 10MB in size.
- If a message indicates that no templates are configured, go to the Manage Templates section and edit the template(s). Make sure all required settings are populated then re-save.
- Choose the desired template in the drop box.
- Choose ‘Start’ to start the import scanning and automation job.
Check Import Status & Errors
- Check the import file status under the import dashboard after automation is completed.
- If the status shows ‘Complete’, the import was successful and all records have been managed.
- If the status shows ‘Incomplete’, click ‘View’, and fix any errors and finish the import process.