Manage Users
- 06 Feb 2024
- 4 Minutes to read
-
PDF
Manage Users
- Updated on 06 Feb 2024
- 4 Minutes to read
-
PDF
Article Summary
Share feedback
Thanks for sharing your feedback!
Overview
Cloudingo offers multi-user logins with Professional or Enterprise-level licenses, which allows for multiple Cloudingo and/or multiple Salesforce connections for security and auditing purposes. Users can be assigned roles that determine access to different areas and functions within the application. Cloudingo also offers audit tracking for better management.
The Cloudingo administrator is responsible for setting up and maintaining all additional users and controlling access to different areas of the application. New users will receive an email with instructions on how to activate and log in with their credentials.
Navigation
Choose the ‘Users’ → ‘Manage’ option from the left-hand-side navigation window to configure settings and to set up new users.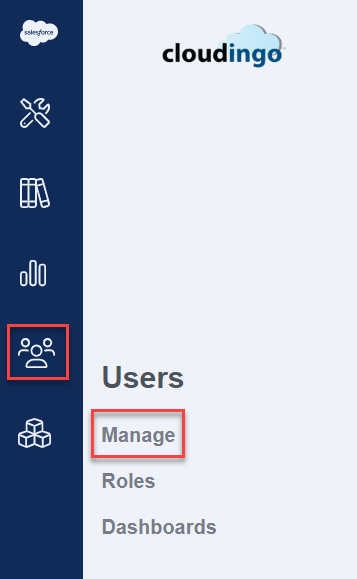
Access Mode
There are three ways to connect to Cloudingo. Two options allow for multiple user access.
- Single User: Communicates with Salesforce using a single Salesforce Admin connection.
- Additional users cannot be set up with this mode.
- Choose the pencil icon to edit the Access Mode and 'Save' after choosing a new Access Mode.
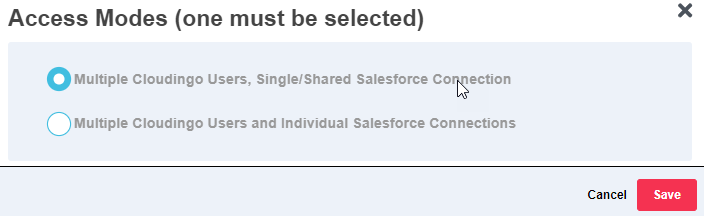
- Multiple Cloudingo Users, Single/Shared Salesforce Connection: Communicates with Salesforce using a single Salesforce Admin connection.
- Additional users can be set up with this mode.
- Users will have unique Cloudingo usernames & passwords to log in to Cloudingo with.
- All users will share the same connection and inherit the Salesforce profile permissions assigned to the connected user.
- Cloudingo audit reports track changes made by individual users.
- Changes in Salesforce (last modified & history tracking) are attributed to the Salesforce admin user connected.
- Cloudingo permissions can be enforced for specific users.
- Recommended for organizations that have restrictive permissions on Salesforce user profiles but want users to have appropriate permissions while using Cloudingo features.
- Additional users can be set up with this mode.
- Multiple Cloudingo Users and Individual Salesforce Connections: Communicates with Salesforce using individual user connections for each user.
- Cloudingo audit reports track changes made by individual users.
- Changes in Salesforce (last modified & history tracking) are attributed to the Salesforce user performing the updates.
- Both Salesforce and Cloudingo permissions are enforced.
Login Types Allowed

At least one must be selected, but both can be selected (the default is both enabled). Choose the pencil icon to edit, choose the desired Login Types Allowed, and 'Save'.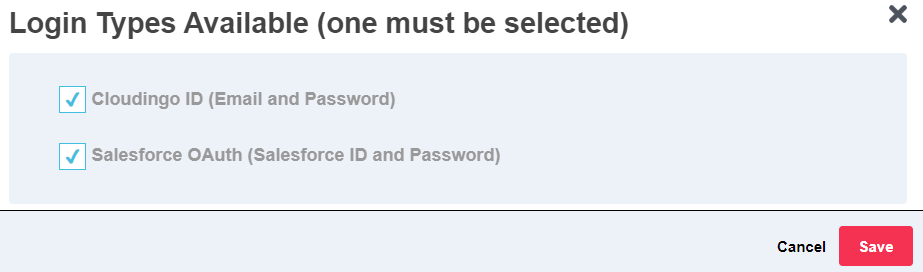
- Cloudingo User ID (Email and Cloudingo password):
- Must be enabled for Multiple Cloudingo Users, Single Salesforce Connection.
- Optional, but recommended for multiple salesforce connections.
- Salesforce Oauth (Salesforce username and Salesforce password):
- Optional, but recommended. Users (including Admins) will be unable to log in using Salesforce credentials if disabled.
Connecting to Cloudingo
- The main Cloudingo administrator will establish the initial administrative connection to Salesforce.
- The Cloudingo administrator will set up and maintain all additional users.
- New users will receive login information and an activation link via email.
- Depending on the account settings, new users may also be required to establish their own connection to Salesforce using their Salesforce credentials.
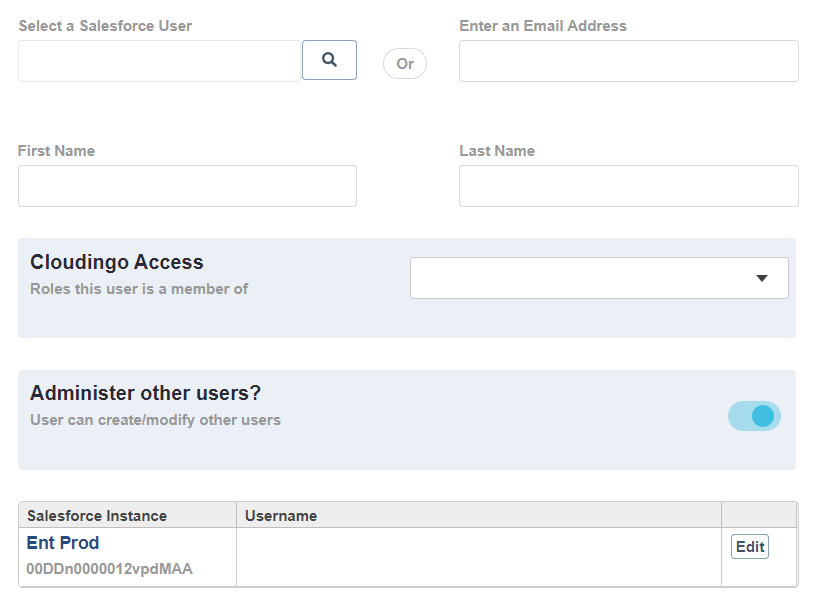
Create Users
- Choose ‘Invite User’ to create a new user.

- Search in the ‘Select a Salesforce User’ box for a specific user in Salesforce or, provide an email address for the user.
- Ensure the email address is valid.
- Ensure the email address is valid.
- Type in the First & Last Name if not choosing from a Salesforce user.
- Assign at least one role to the user in the 'Cloudingo Access' section. Roles control which features within Cloudingo the user can access.
- Choose if the user will be an admin-level user by toggling the option under the ‘Administer other users?’ option.
- Toggle to the right to enable, toggle to the left to disable.
- Admin users will have access to the Subscription, Settings, Roles, Users, Dashboards, Synonyms, Data Services, and Excluded Records sections.
- Assign the Salesforce Usernames to each Salesforce instance if not pre-selected and if required.
- Choose ‘Edit’ to re-assign the Salesforce Username.
- Choose ‘Save’ to create the user.
- The new user will receive an email with login details and an activation link.
- After clicking the link, the user will set up a Cloudingo passwordfor their unique login.
- The email address will be the Cloudingo username.
Assign Filters to User Dashboards
- New Cloudingo users' dashboards will be empty unless the Admin has copied filters over or created new filters for the user.
- Users with role/permission access can create their individual filters manually or by adding filters from the Filter Library.
- Admins can use the Dashboard to copy necessary filters to users.
Activate or Deactivate Users

- Choose the ‘Active’ checkbox to make a user active.
- Deselect the ‘Active’ checkbox to make a user inactive.
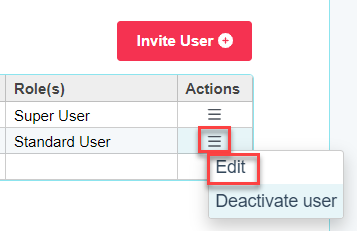
- Or choose ‘Deactivate’ next to the user under the ‘Actions’ column menu options.
- Owner Admin accounts cannot be deactivated. To transfer ownership from one user to another, please contact the Cloudingo Support Team.

- Owner Admin accounts cannot be deactivated. To transfer ownership from one user to another, please contact the Cloudingo Support Team.
- Or choose ‘Deactivate’ next to the user under the ‘Actions’ column menu options.
Edit a User
- Choose ‘Edit’ next to the user under the ‘Actions’ column menu options.
- Make changes as necessary and ‘Save’.
- In some cases, a new activation link will be sent to the user during save.
- Activate/Deactivate or set a user to Admin/Non-Admin directly from the main page by enabling the checkboxes accordingly.
- Admin users will have access to the Subscription, Settings, Roles, Users, Dashboards, Synonyms, Data Services, and Excluded Records sections.
Note:
Users can share filters with other users and/or environment connections using the Filter Library. The Filter Library requires the user to log in to their Cloudingo account and requires that they have access to create filters. However, Admins can use the Dashboards feature to copy filters between users/environments without needing to log in as the user that owns the filters that need to be shared.
Was this article helpful?
