- 17 Jun 2024
- 5 Minutes to read
-
PDF
Delete Unique Records
- Updated on 17 Jun 2024
- 5 Minutes to read
-
PDF
Overview
Cloudingo allows users to create a unique list of records to delete in bulk. Simply specify which records to delete by choosing specific field values. For example, choose all records that do not have an email address, do not have a phone number, and do not have an address. Or records that were just imported into Salesforce incorrectly. Build criteria or use an existing Salesforce report to pull in records for deletion. Preview results for accuracy and delete those worthless records!
Navigation
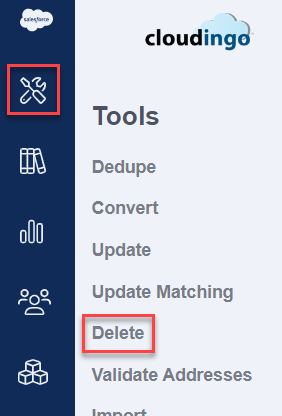
- Open the Delete Unique Records window. Choose the ‘Tools’ → ‘Delete’ option from the left-hand-side navigation window.
2. Tabs at the top of the page separate the indexed objects. Choose 'All' to view all indexed and non-indexed object filters.
- Choose ‘Create New Job’ to build a new filter.
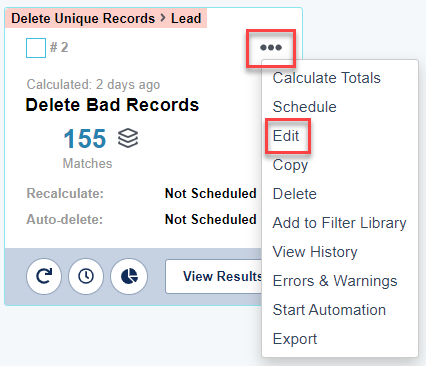
- Choose ‘Edit’ from a specific filter’s menu option to edit an existing filter.
Actions & View Options
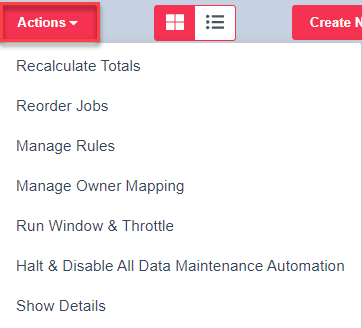
- The 'Actions' menu provides a variety of options.
- Recalculate Totals: Recalculates (queries) all filters at one time.
- Reorder Jobs: Choose this option to reorder the filters for display.
- Manage Rules: Choose this option to get directly into the Manage Rules page.
- Manage Owner Mapping: Choose this option to get directly into the Owner Mapping page.
- Run Window & Throttle: Choose this option to get directly into the Run Window & Throttle page.
- Halt & Disable All Data Maintenance Automation: Choose this option to temporarily stop all currently running or future automation jobs.
- Jobs currently running can take time to completely stop.
- Show Details: Choose this option to show additional filter details (such as the filter description, fields used, and the rule applied if applicable.
- Choose 'Hide Details' from the 'Actions' menu to return back to the regular filter view.
- Choose 'Hide Details' from the 'Actions' menu to return back to the regular filter view.
- Toggle between Tile View or List View to control how filters are displayed.

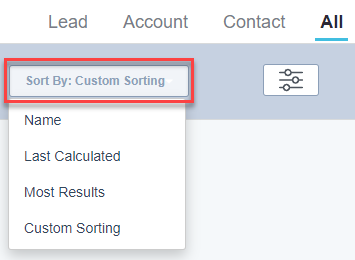
- Sort By: Choose from a variety of sort options to display filters.
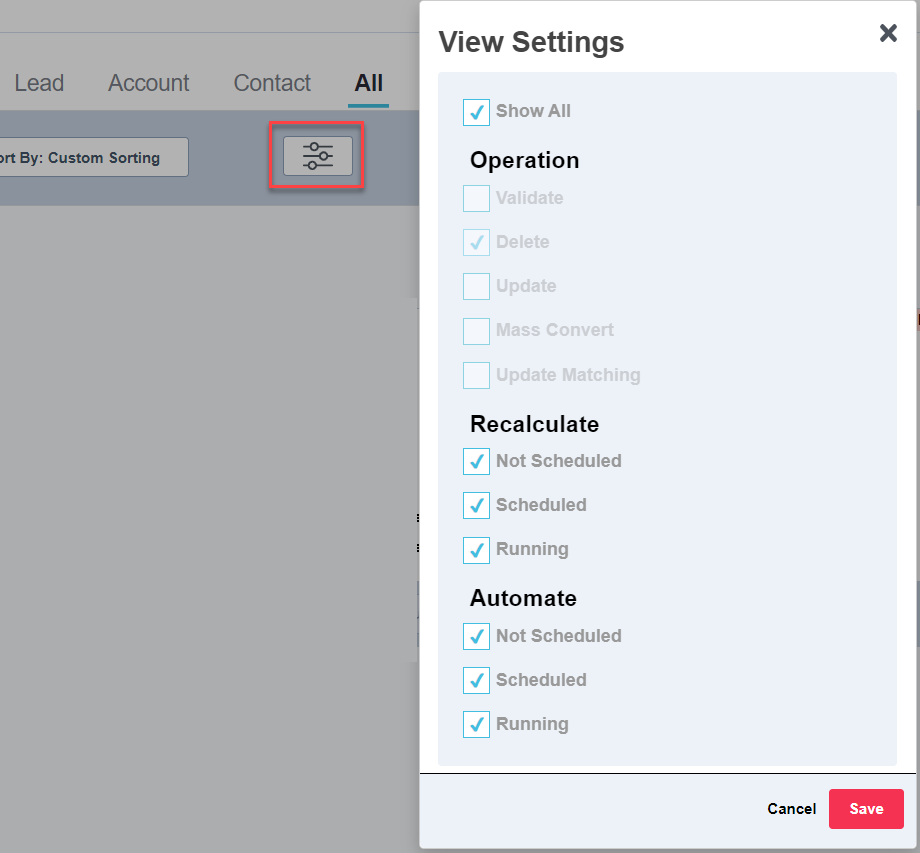
- View Settings: Choose from a variety of view settings to display filters.
Step 1: The basics
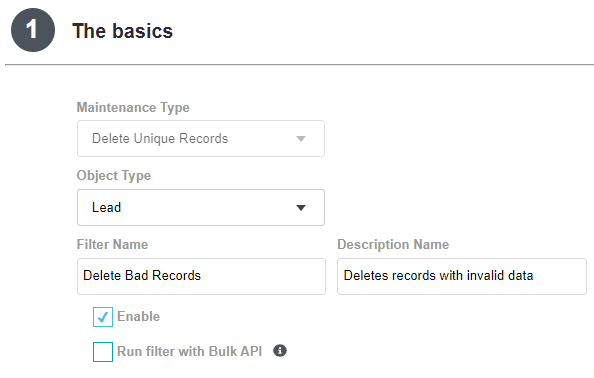
- Maintenance Type: This will automatically default to ‘Delete Unique Records’.
- Object Type: Choose the object that the deletions will be applied to. The list includes any standard or custom object.
- Filter Name: Give the filter a descriptive name.
- Description Name (optional): Give a brief description of the filter.
- Enable: All filters are enabled by default. Disabling makes the filter inactive.
- Run filter with Bulk API: Choose this option for any indexed objects that should use Bulk API to query for records. Non-indexed objects use Bulk API by default.
Step 2: Which records do you want to delete?
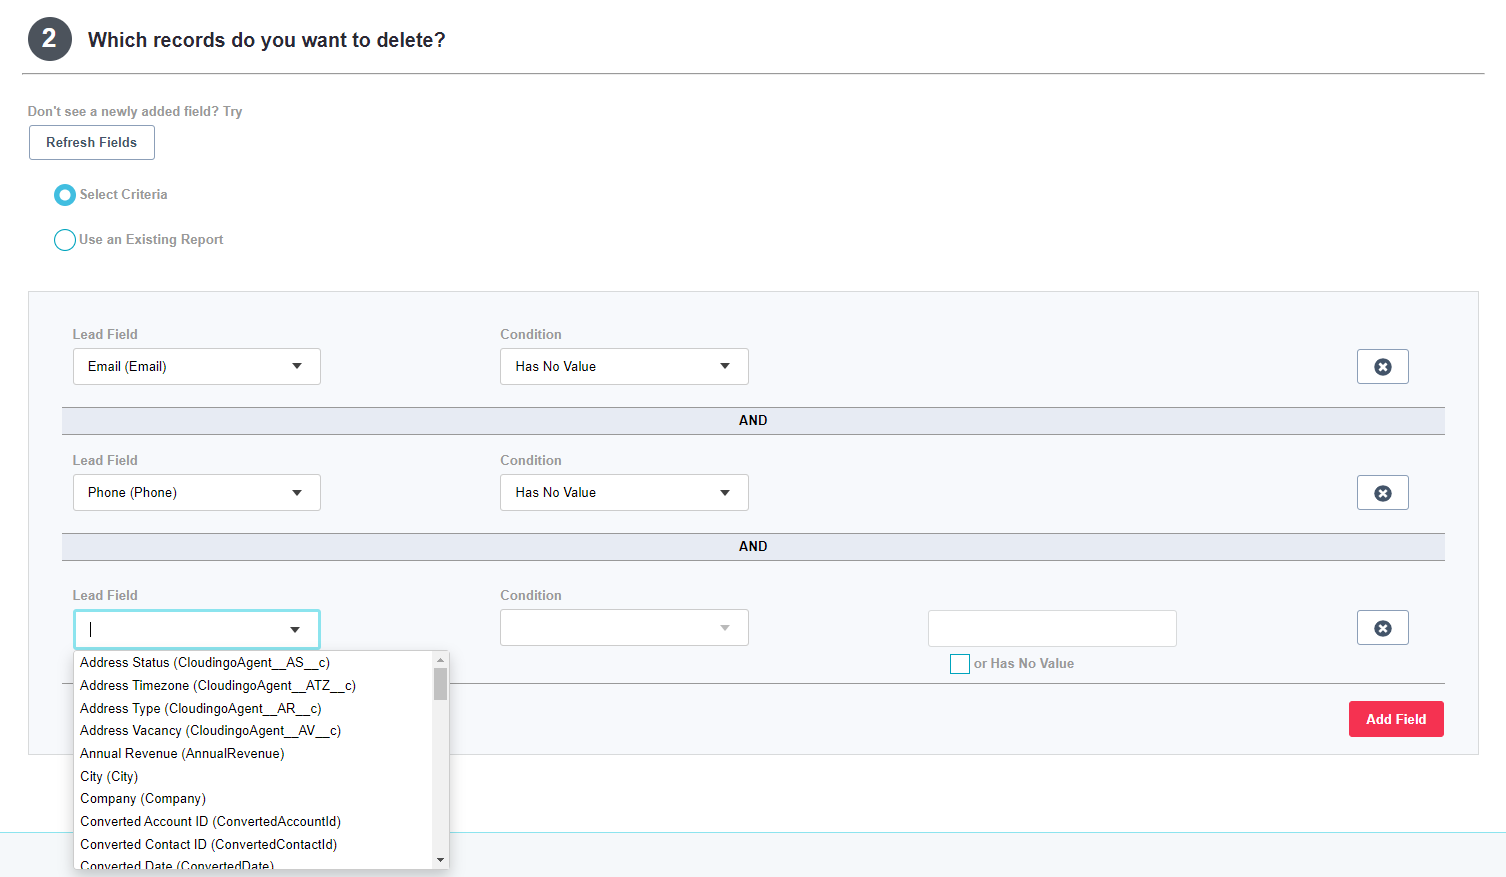
- Select Criteria: Build criteria to filter out records to delete.
- Choose the ‘Add Field’ button to begin adding fields to the criteria.
- (Object) Field: Choose a field for the criteria to find records.
- Use the ‘Refresh Fields’ option at the top of Step 2 if a field is not showing in the list.
- Use caution when using formula, calculated, or related object fields. Syncs are not sent to Cloudingo when the underlying value is changed. Reindexing may be required. Consider using a Salesforce report instead of building criteria when using these field types.
- Condition: Choose a condition (such as ‘Equal’, ‘Contains’, ‘Has a value’, etc.).
- Specify a value in the far-right blank box if one appears. The condition chosen may require a value, but in some cases a value is not required.
- Or Has No Value: Choose this option to also allow records with a blank value for the field to pull into the results.
- Choose ‘Add Field’ again to add additional criteria to find records.
- Use an Existing (Salesforce) Report:
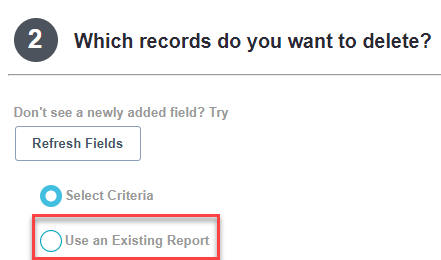
- Salesforce reports will appear in the drop box when this option is selected. Choose the desired Salesforce report to pull the list of records for deletion.
- Report must contain the Salesforce Record ID using the standard ID field in the output.
- Report must be accessible to the user establishing the Cloudingo connection.
- Salesforce reports will appear in the drop box when this option is selected. Choose the desired Salesforce report to pull the list of records for deletion.
Choose ‘Save’ or ‘Save & Run’ (to query for results) to save the filter configuration.
Re-indexing
When creating or editing a filter with new fields (on indexed objects), Cloudingo initiates a re-indexing process on the object that may take time. To avoid this, users can pre-set a list of fields they will be using in their filters by going to 'Account' → 'Settings' → 'Manage Objects' from the top right toolbar.
Preview Results
Make sure to preview the filter results for accuracy before performing deletions.
- Choose the ‘View Results’ option on the filter after the filter has been calculated.
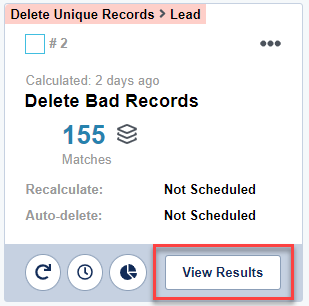
- Choose the red arrow on a group to preview the results. Check a few records for accuracy.

Delete
After checking records for accuracy, run the delete process.
Three ways to delete:
- Manually: Delete one record at a time from the preview page.

- Delete: Deletes the record and returns the view back to the record list.
- Delete & Load Next: Deletes the record and immediately opens the next record.
- Skip & Load Next: Loads the next record without updating the current record.
- Mass Delete: Delete records one page at a time from the preview page.

- Select records using the checkbox to the left to be deleted.
- Or choose the Select All box at the top left corner.
- Choose the ‘Mass Delete Unique Records’ button at the top of the record list to submit all selected records in view.
- Page through results using the page numbers at the bottom of the results list.
- Mass Deletes can only be done one page at a time.
- Watch the Activity Stream for the delete confirmation back from Salesforce to see if deletes were successful or a failure (or view the Activity Stream Error/Warnings report from the Reports dashboard to get a list of failures).
- Results within the pages will refresh in the list as records are deleted and when moving through the pages.
- Select records using the checkbox to the left to be deleted.
- Automation: Delete all records in the filter by starting a one-time automation job or schedule to run the job repeatedly.
- For a one-time job:
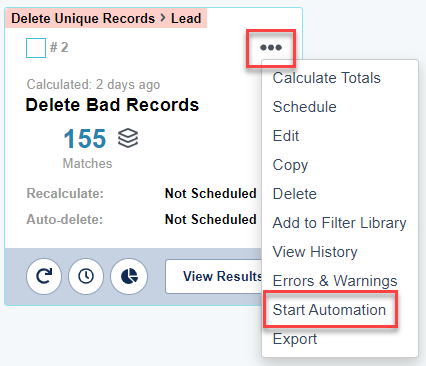
- From the filter’s menu option, choose ‘Start Automation’ or choose the ‘Automation’ menu option from within the preview page and choose ‘Start Automation’.
- Choose ‘Automate’ on the confirmation page.
- Check the Run Window & Throttle settings if the job does not start within a reasonable time.
- Check the Run Window & Throttle settings if the job does not start within a reasonable time.
- To schedule the job to run repeatedly:
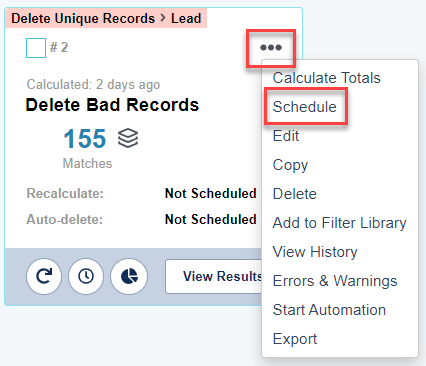
- From the filter’s menu option, choose ‘Schedule’.
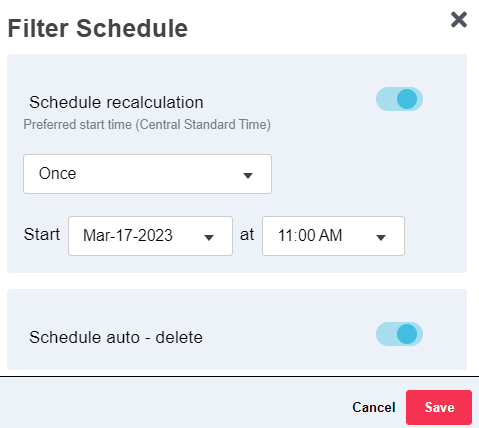
- Toggle the dot to the right to enable the ‘Schedule recalculation’.

- Specify a frequency (once, hourly, daily, or weekly. Set any additional settings related to the frequency as required.
- Specify a start date and start time.
- The ‘Keep Schedule Running’ option must be enabled for the job to continue processing at the scheduled time.
- Toggle the dot to the right to enable ‘Schedule auto – delete’ to process the job and 'Save'. If disabled, the job will only perform the calculation (query) at the scheduled time.
- From the filter’s menu option, choose ‘Schedule’.
- For a one-time job:
.png)

