Rules (Convert): Selecting Values for Convert
- 24 Mar 2023
- 8 Minutes to read
-
PDF
Rules (Convert): Selecting Values for Convert
- Updated on 24 Mar 2023
- 8 Minutes to read
-
PDF
Article Summary
Share feedback
Thanks for sharing your feedback!
Overview
When converting records, Cloudingo uses the native conversion process in Salesforce. Converts will behave the same way they do when initiated on the Salesforce side. However, Cloudingo’s convert rules allow for configuring logic to choose values to override the existing Contact or Account data during the conversion process. With a normal Salesforce convert, overrides are not possible. Exception rules can also be configured to skip automatic conversions on certain records.
Navigation
- Open the Manage Rules window: Choose the ‘Tools’ → ‘Convert’ → ‘Rules’ option in the left-hand-side navigation window.
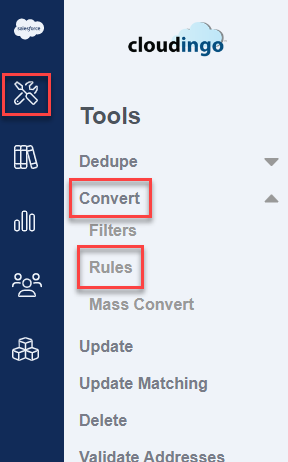
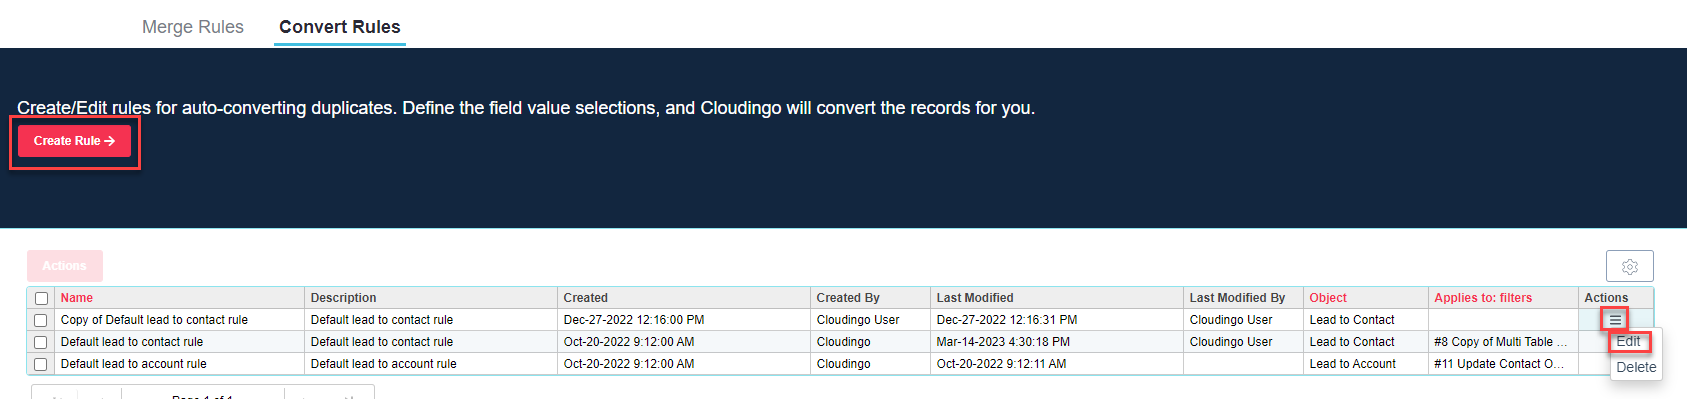
- Choose ‘Create Rule’ to build a new custom rule.
- Choose ‘Edit’ next to a specific rule to edit an existing rule under the ‘Actions’ column.
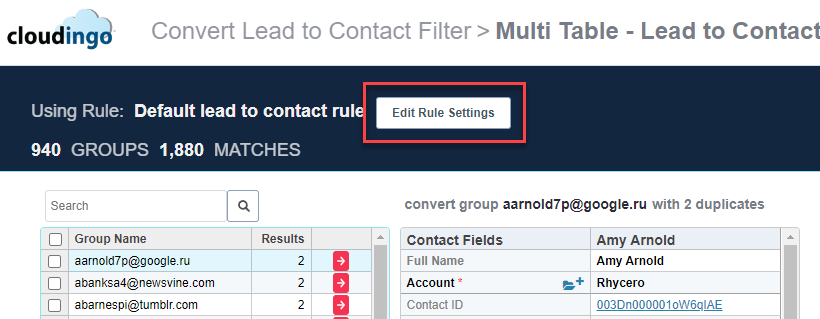
- Access a rule setting from within the Merge Preview page for easy and quick editing while viewing results for accuracy.
- Choose 'Edit Rule Settings' option from within the Merge Preview page.
- Choose 'Edit Rule Settings' option from within the Merge Preview page.
Note:
If editing from the preview, saving rule changes will return to the record preview page previously being viewed. New rule changes will be reflected immediately in the preview.
Step 1: The Basics
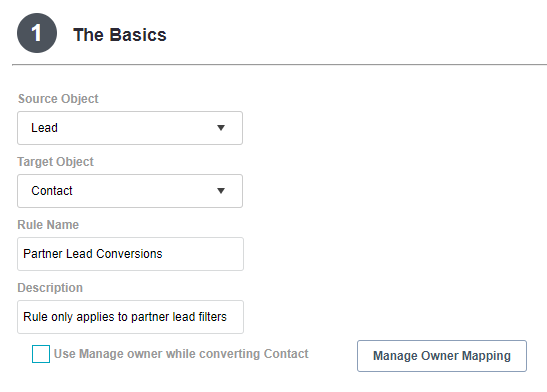
- Source Object: Choose the Lead object (this is not editable if editing an existing rule).
- Target Object: Choose either Contact or Account for the object. Choosing Contact will work with Lead to Contact filters while Account will work with Lead to Account filters.
- Rule Name: Give the rule a descriptive name.
- Description (optional): Give a brief description of the rule.
- Use Owner Mapping while merging records: Choose this option to apply Owner Mapping to reassign record ownership from inactive or queue owners to new owners during merge/convert.
Step 2 (optional): Group Fields

- Set up any field groupings to group/link field values together. This works similarly to the merge rule field grouping.
- The exception is the Lead fields must be mapped using the 'Map Grouped Fields' option (the button is the last option in the field grouping rule).
- The fields initially configured in the drop boxes will be Contact fields.
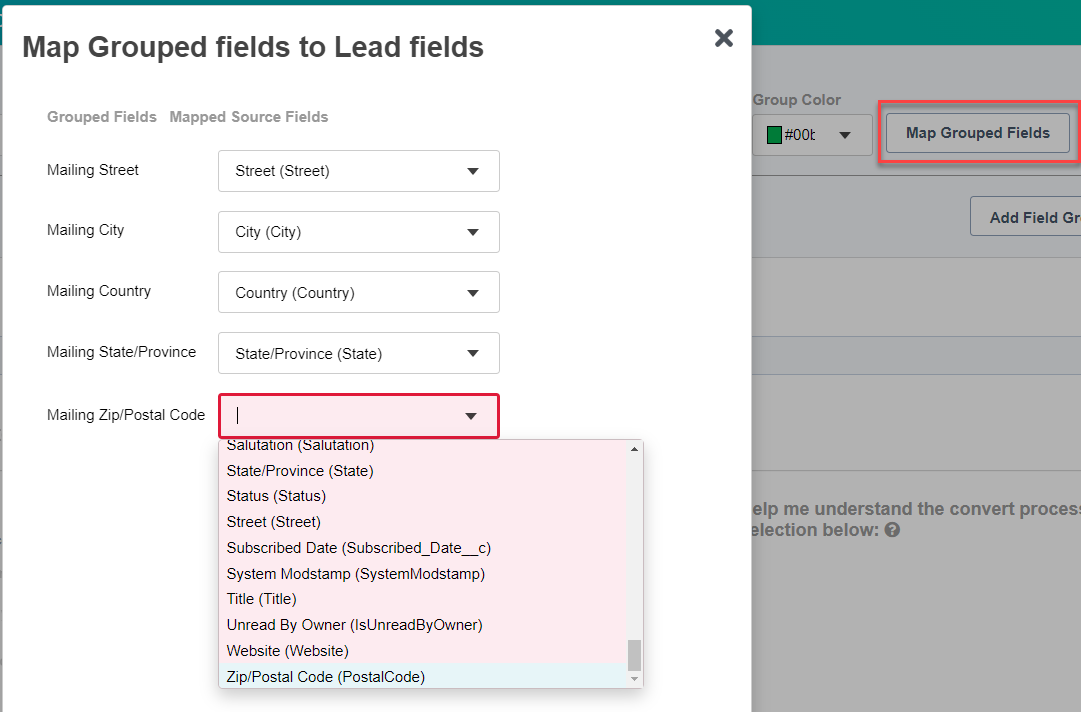
- The fields initially configured in the drop boxes will be Contact fields.
- The exception is the Lead fields must be mapped using the 'Map Grouped Fields' option (the button is the last option in the field grouping rule).
- Choose the 'Add Field Group' option to add a field grouping. Multiple groupings can be configured.

Step 3: How do you want to merge records?

Lead to Contact or Person Account
Note:
- Lead to Contact and Lead to Person Account filters can produce multiple Leads matched with multiple Contacts/Person Accounts if the dedupe merge process has not been run first.
- If multiple Leads match with only one Contact/Person Account, the Leads get merged (using no logic) before converting into the Contact/Person Account. It is advisable to process Lead merge filters before working in Convert filters to achieve the safest results possible.
- If Leads match with multiple Contacts/Person Accounts, Cloudingo will convert the Lead(s) into the first Contact/Person Account record identified. This can cause convert failure messages when Cloudingo attempts to process the Leads on subsequent Contacts/Person Accounts. It is advisable to process Contact or Person Account merge filters before working on Convert filters to achieve the safest results possible.
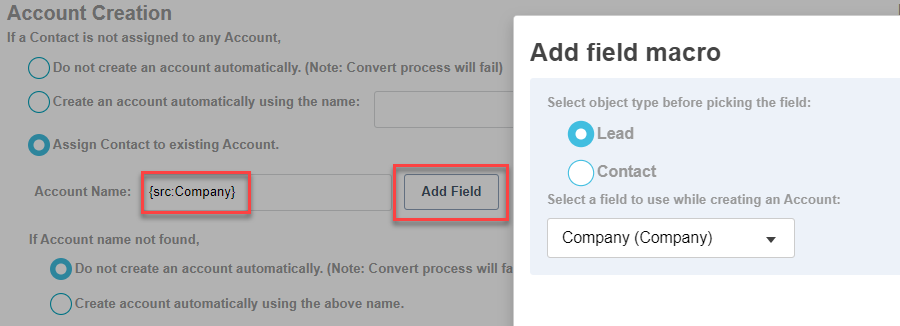
Account Creation
Tell Cloudingo how to create Accounts if converting Leads into a Contact record that does not have an Account assigned.
- ‘Do not create an account automatically’:
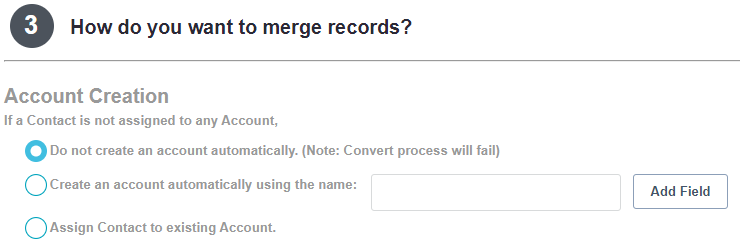
- This is the native way Salesforce handles conversions therefore the default setting.
- Convert process will fail when a Lead attempts to convert into a Contact without an associated Account.
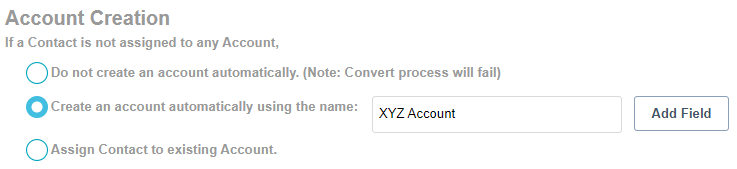
- ‘Create an account automatically using the name’: The convert process will create a new Account and convert all Leads into the user-defined Account Name.
- Type in the desired Account name.
- Or use the Lead Company name to create new Accounts.
- Choose the ‘Add Field’ option to choose the ‘Lead’ object and choose ‘Company’ then choose ‘Add’.
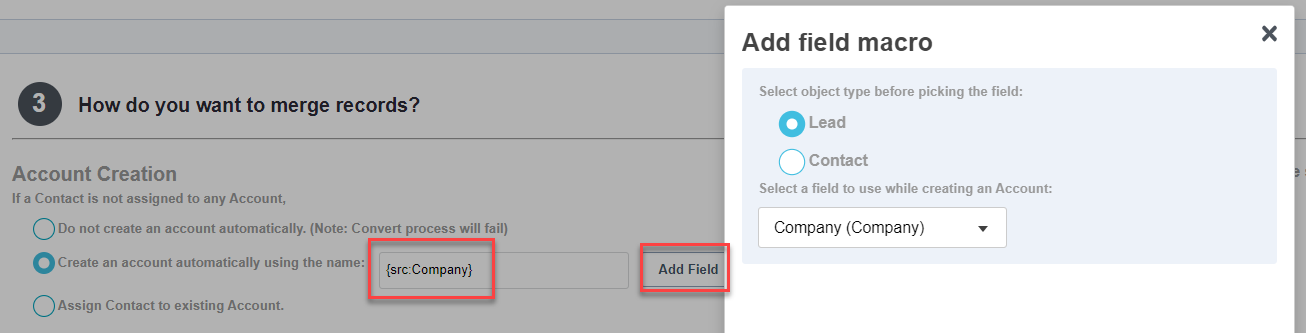
- Choose the ‘Add Field’ option to choose the ‘Lead’ object and choose ‘Company’ then choose ‘Add’.
- Type in the desired Account name.
- ‘Assign Contact to existing Account’: Convert process will convert all Leads into an existing Account if one exists and create a new Account if one does not exist.
- Type in the desired Account name to convert into a specific existing Account.
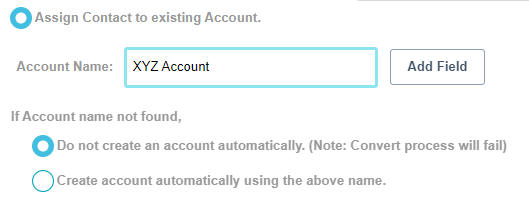
- Or use the Lead Company name to search for existing Accounts with the same name.
- Choose the ‘Add Field’ option to choose the ‘Lead’ object and choose ‘Company’ then choose ‘Add’.
- If a matched Account Name is identified, Contacts will be created under the identified Account.
- If a matched Account Name is identified, Contacts will be created under the identified Account.
- ‘If Account name not found’: When using the 'Assign Contact to existing Account', an option must be configured for scenarios where a matched Account cannot be found.
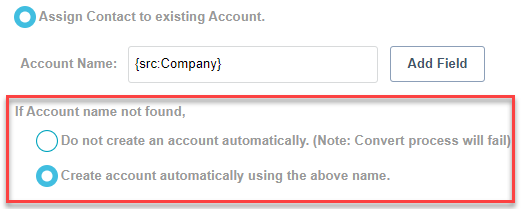
- ‘Do not create an account automatically’: Convert process will fail when a Lead attempts to convert into a Contact without an associated Account and when the Lead Company name does not find a matching Account Name.
- ‘Create account automatically using the above name’: Convert process will create a new Account using the Lead Company name if an existing Account with the same name is not identified.
- Choose the ‘Add Field’ option to choose the ‘Lead’ object and choose ‘Company’ then choose ‘Add’.
- Type in the desired Account name to convert into a specific existing Account.
Update Contact Field Values
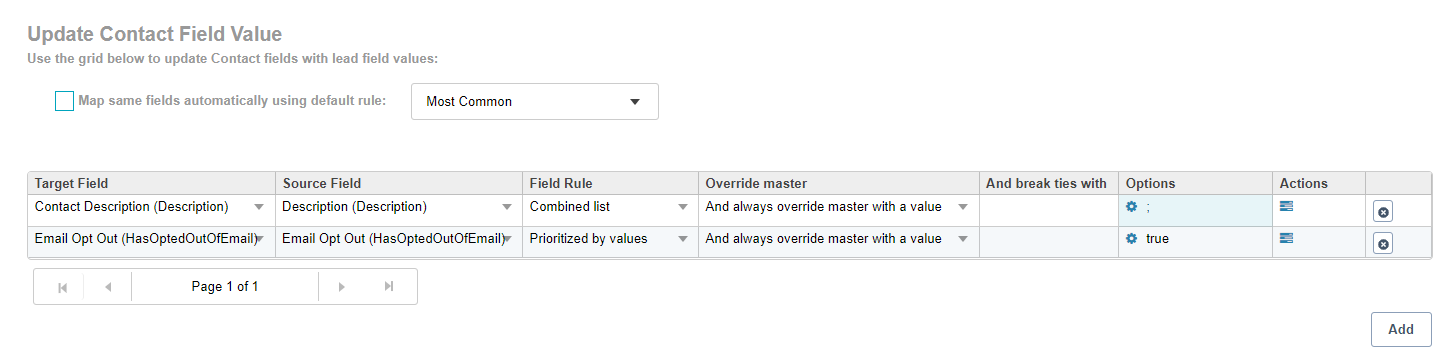
The Contact record is always the master record. Set up rules to define how to pull specific field values during conversion. Rules can potentially override existing Contact Field Values.
To create field rules:
- Choose the ‘Map same fields automatically using default rule’ to add a list of pre-set field mappings.
- Rules will be created based on the rule chosen for all fields that contain the same name in both objects. Check the box again to remove the added rules.
- Click the ‘Add’ button in the middle section.
- Choose a field in the ‘Target Field’ drop-down (standard or custom field). Target fields will populate from the Contact object.
- This drop box is searchable if typing in a full or partial field name.
- Choose a field in the ‘Source Field’ drop-down (standard or custom field). Source fields will populate from the Lead object.
- Fields must be mapped between the Contact & Lead so that Cloudingo knows which data to compare to identify matches.
- Choose a rule to determine how the value gets chosen during convert. See more details on Rule options in the Creating & Managing Merge Rules article.
- Choose an override to determine how the value will be handled during convert. See more details on override options in the Creating & Managing Merge Rules article.
Convert specific details are provided below.- ‘And always override Contact with a value’:
- Cloudingo evaluates all records in both objects (Lead & Contact) to determine which value gets set.
- This option does not always take the lead value and override the Contact value.
- ‘And always override Contact even with a blank’:
- Cloudingo evaluates all records in both objects (Lead & Contact) to determine which value gets set.
- This option does not always take the Lead value and override the Contact value.
- ‘And override Contact when blank’:
- Cloudingo overrides the Contact with the Lead data only if the Contact value is blank.
- Salesforce Lead Mappings (on the Salesforce side) are still honored during the Cloudingo conversion. This option is only necessary if a field mapping in Salesforce does not already exist, and if filters identify multiple Leads to convert with a Contact and a rule is necessary to determine which Lead value to pull from.
- ‘And never override Contact’:
- Cloudingo will always retain the Contact value.
- By default, Cloudingo will never override the Contact value even without a rule. This option is not necessary for retaining Contact values, but can be used if needed to set up a rule to perform an Action without impacting the Contact field value.
- Salesforce field mappings cannot be bypassed. Blank values may still get overwritten if mappings are configured on the Salesforce side.
- ‘Ignore Contact value’:
- Cloudingo will choose the Lead value and always override the Contact.
- This option does not look across both objects (Lead & Contact) to apply the rule. Cloudingo will only look at Lead records to process the rule selected.
- ‘And always override Contact with a value’:
- Choose a tiebreaker if Cloudingo indicates that the ‘And break ties with’ setting is required.
- Tiebreakers are only required on certain rules. More information regarding tiebreakers can be found in the Creating & Managing Merge Rules article.
- Set up Options settings if Cloudingo indicates that a setting is required.
- Options are only required on certain rules. More information regarding rules and options settings can be found in the Creating & Managing Merge Rules article.
- Set up Actions settings as desired. More information regarding Actions settings can be found in the Creating & Managing Merge Rules article.
Exceptions

- Set up an Exceptions to skip automatic conversions on certain records.
- ‘Target’ record = Contact or Account record in the definitions below.
- Exception options include:
- Group when NO value exists for the resulting target record for field (needs field mapping)
- Group when one or more records is protected
- Group when same value does not exist in all records (Blank not treated as a value)
- Group when Value exists in more than one record
- Group when Specified Value exists in more than one record
- Group when record has less than X% of the fields with values
- Group when its size is >=X
- Group when its size is <=X
- Source Record when Record has any value in field
- Source Record when Record has specified value in field
- Source Record when Value does not match target record for fields (needs field mapping)
- Source Record when Value does not match target record (blank value is matched, needs field mapping)
Lead to Account
- Steps 1 and 2 are the same process as described in the Lead to Contact section above with the exception that rules are configured on Account object fields rather than Contact object fields. Field rules will override the Account object data, not the Contact object data.
- Field rules update Account field values with every Lead conversion performed.
- Field rules are rarely used for Lead to Account conversions.
- Field rules do not apply to Contact values. Salesforce field mappings control which data carries over to the created Contact record.
- In Step 3, tell Cloudingo how to assign ownership on newly created Contacts.
- Assign all newly created Contacts to the Account Owner.
- Assign all newly created Contacts to the respective Lead Owner.
Step 4: Additional Convert Options
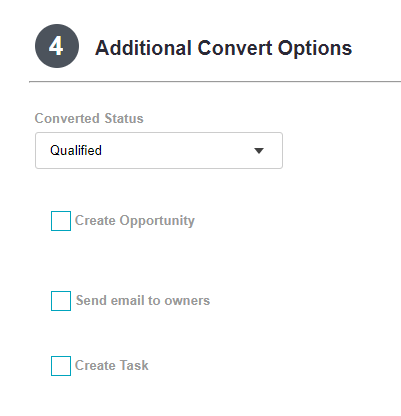
- Choose a ‘Converted Status’ to default to all conversions.
- Convert Status options pull from Salesforce. The list will include Lead Status’ configured as a convert status option.
- To exclude Cloudingo dedupe conversions from Salesforce Conversion Reports, consider setting up a new convert status and assigning it to the Cloudingo defaulted status. Then, exclude records with that status from the Convert reports.
- By default, the ‘Create Opportunity’, ‘Send email to owners’, and ‘Create Task’ convert options are disabled. This is because the conversions are not part of a Sales cycle, but rather deduping efforts.
Was this article helpful?
